Have you noticed your freshly washed laundry smells stale or your washing machine drum looks grimy? You’re not alone. Over time, washing machines accumulate dirt, grime, detergent residue, and mold that can affect both the cleanliness of your clothes and the machine’s performance. The good news? Learning how to clean a washing machine is easier than you think, and you can do it with simple household ingredients like white vinegar and baking soda.
This comprehensive guide will teach you everything you need to know about washing machine maintenance, whether you have a front-loading or top-loading machine. We’ve consulted expert advice and analyzed the best practices to help you keep your appliance running efficiently while eliminating unpleasant odors.
Why Should You Clean Your Washing Machine?
Many people ask: “Why clean a machine that uses hot water and soap regularly?” The answer lies in understanding how modern washing machines work.
The Science Behind Machine Buildup
Over the years, washing machines—especially those designed after the 1990s—have shifted toward lower-temperature washing cycles. This transition, combined with enzyme-based detergents replacing phosphate-based formulas, created the perfect environment for bacterial growth. These bacteria thrive in the moist, cool environment of your washing machine’s drum, pump filter, and rubber gasket.
Common Problems Caused by Dirty Washing Machines
- Unpleasant odors: Bacteria and mold growth create that distinctive “stale” smell that transfers to your clean laundry
- Soap scum and detergent residue: Buildup on the drum and internal components reduces cleaning effectiveness
- Mold and mildew growth: Particularly in front-loading machines due to the rubber gasket design
- Lime deposits: Hard water minerals can accumulate in pipes and reduce machine efficiency
- Mysterious stains: Grime and residue can streak your clothes during the wash cycle
- Pump filter clogs: Debris accumulation can block water drainage and cause mechanical problems
Who’s Most at Risk?
- Owners of HE (high-efficiency) washers that hold residual water in components
- People living in humid climates where washers don’t dry completely between loads
- Those with hard water that causes mineral buildup
- Families who don’t regularly leave their washing machine door open to air dry
What You’ll Need: Tools and Supplies Guide
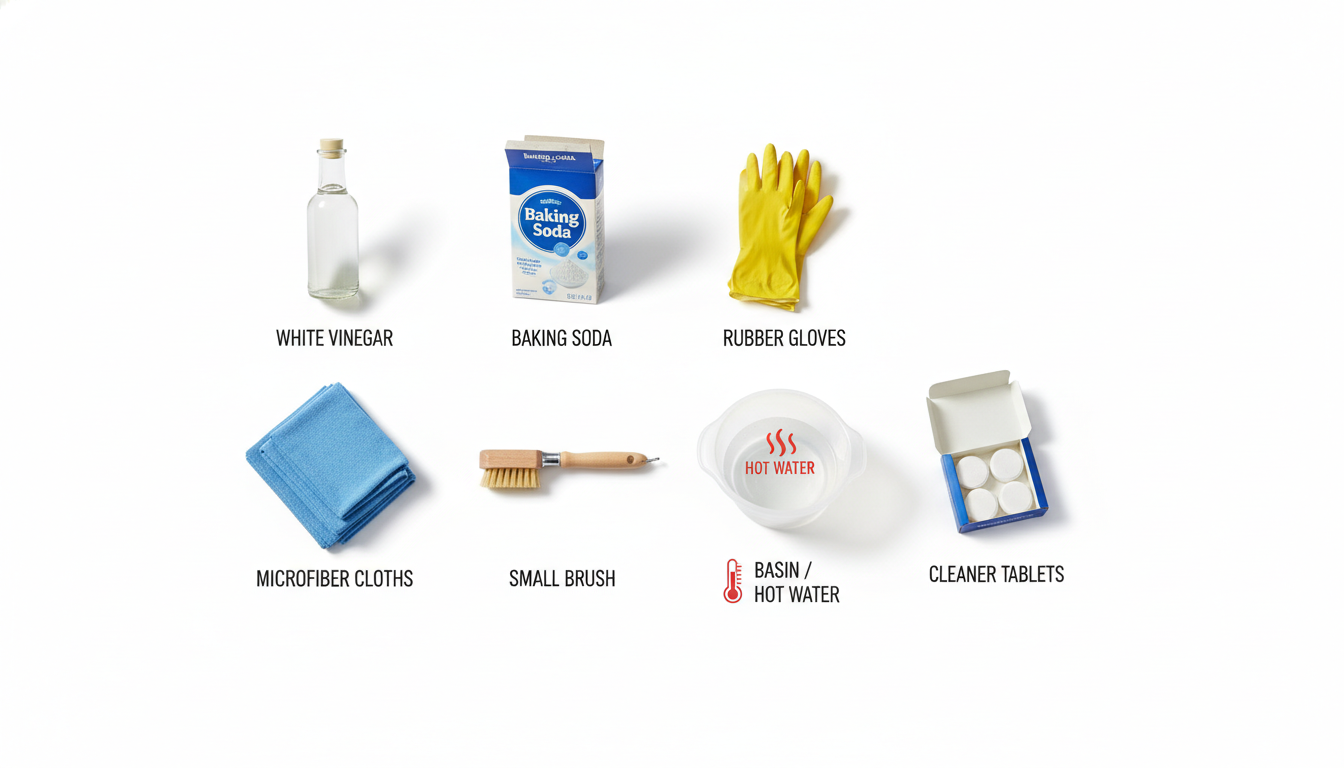
Essential Cleaning Supplies
- White vinegar (2-4 cups): A natural bacteria fighter and descaling agent
- Baking soda (½ cup): Powerful deodorizer and grime remover
- Microfiber cloths (2-3 pieces): For gentle, streak-free drying
- Rubber gloves: Protects hands from bacteria and cleaning solutions
- Small scrub brush: For reaching ridges and crevices in filters
Equipment
- Shallow basin or container: To catch water when removing the filter
- 24-32 ounce soaking container: For filter submersion
- Washing machine cleaner tablets (optional): Commercial alternatives like Affresh or Tide Ultra Oxi
- Old toothbrush: For detailed cleaning of knobs and dispensers
Optional Professional Products
- Affresh washing machine cleaner tablets
- Tide Ultra Oxi Powder Laundry Detergent
- Oxygen-based bleach alternatives (chlorine-free)
How Long Does It Take to Clean a Washing Machine?
- Active cleaning time: 30-45 minutes
- Soak time: 15 minutes to 1 hour
- Machine cleaning cycle: 45 minutes to 1.5 hours (depending on your model)
- Total time: 2-3 hours (mostly passive waiting time)
Step-by-Step Instructions: How to Clean Your Washing Machine
For Front-Loading Washing Machines
Step 1: Extract and Clean the Filter
Front-loading machines have a pump filter located at the bottom corner. This is the most important component to clean, as debris accumulates here and can cause drainage problems.
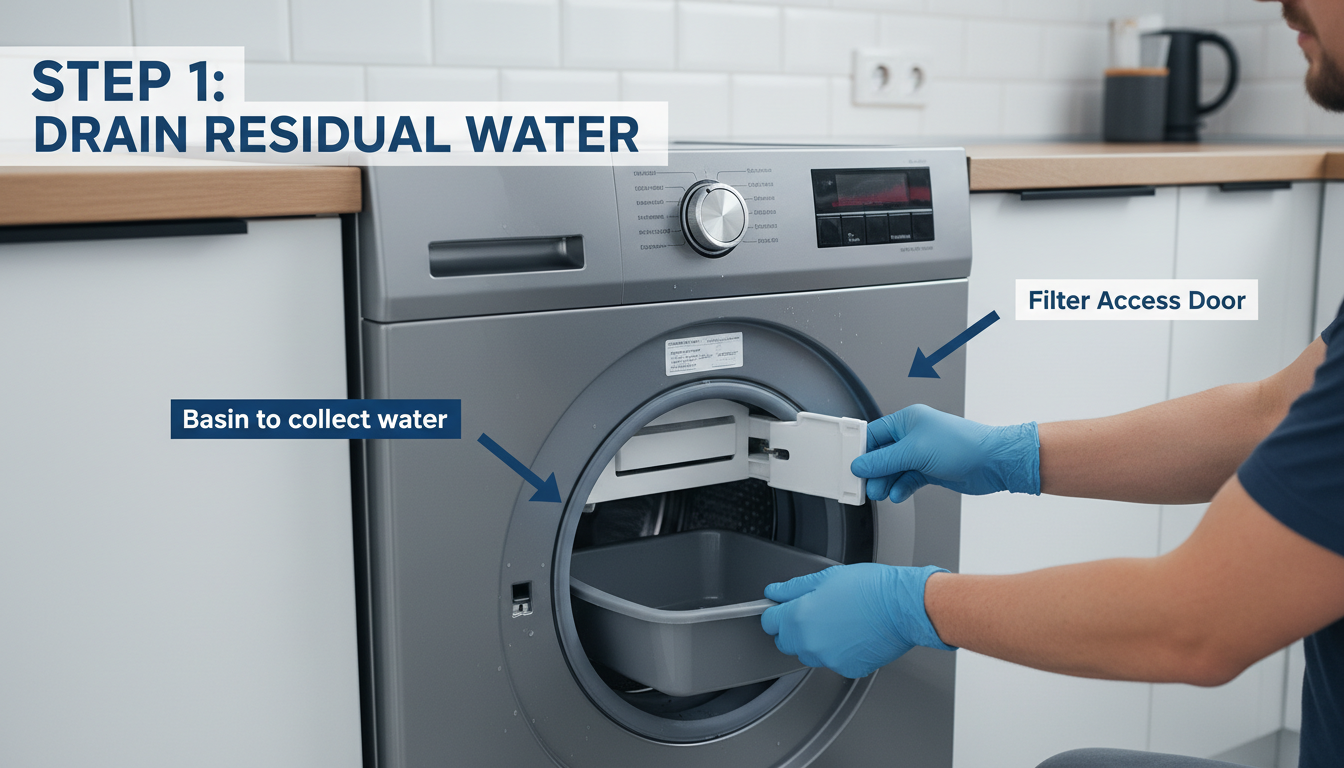
Instructions:
- Unplug your washing machine for safety
- Place a shallow basin on the floor directly under the filter access door
- Open the small door/panel where the filter is located
- Wipe the interior of the access area with a dry cloth
- Slowly unscrew the filter in a counterclockwise direction—water will begin to pour out
- Keep your microfiber cloth nearby to catch spills
- Empty and rinse the basin if water spills
- Remove the filter completely and place it on a microfiber towel
Step 2: Deep Clean the Filter
The filter is where most debris accumulates. Inspect it carefully and clean all ridges.
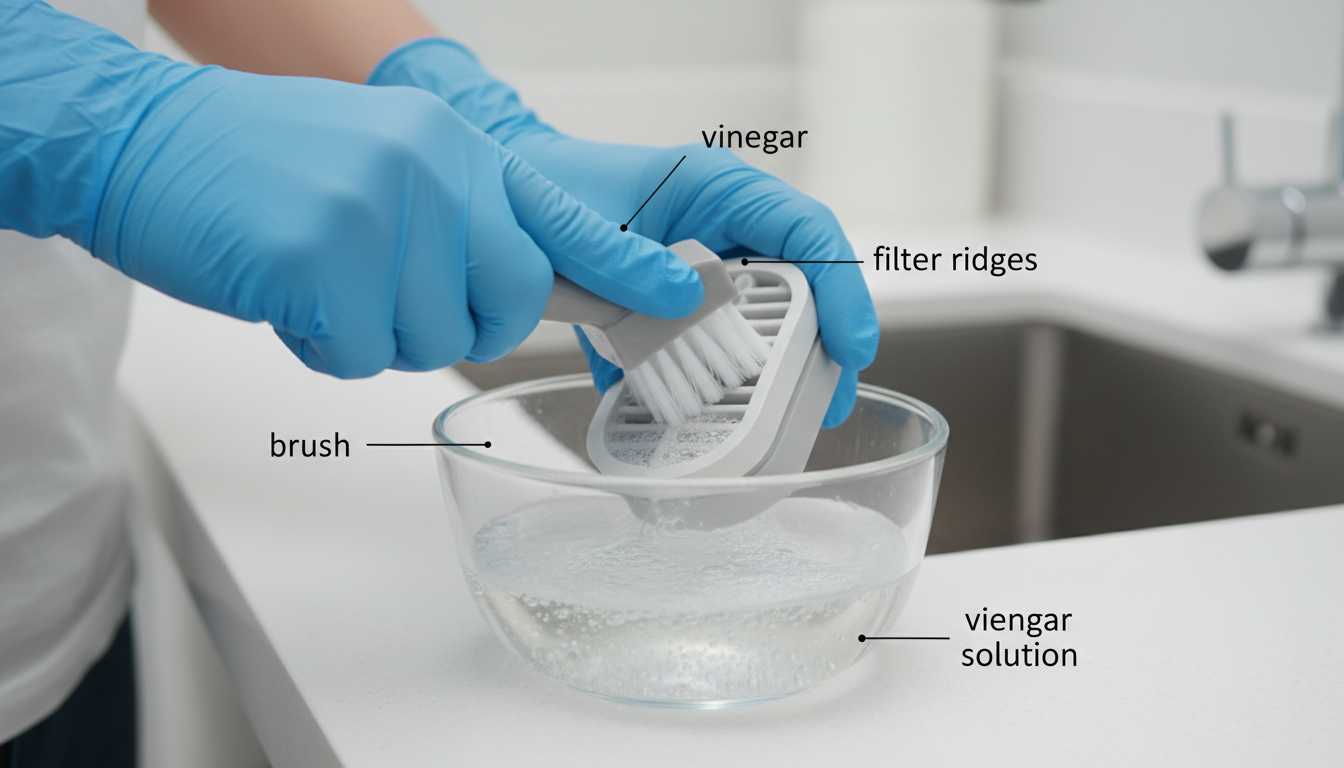
Instructions:
- Examine the filter for hair, lint, and debris
- Remove larger particles by hand
- Dip a small brush into white vinegar
- Scrub all ridges and crevices thoroughly, paying attention to the fine mesh areas
- Rinse the filter under hot running water
- Place the clean filter in a container filled with hot water
- Let it soak for 15 minutes to 1 hour (longer for heavily soiled filters)
- After soaking, rinse again under hot water
Step 3: Clean the Rubber Gasket and Drum Interior
The rubber gasket (seal around the door) is a common hiding spot for mold, mildew, hair, and small objects.
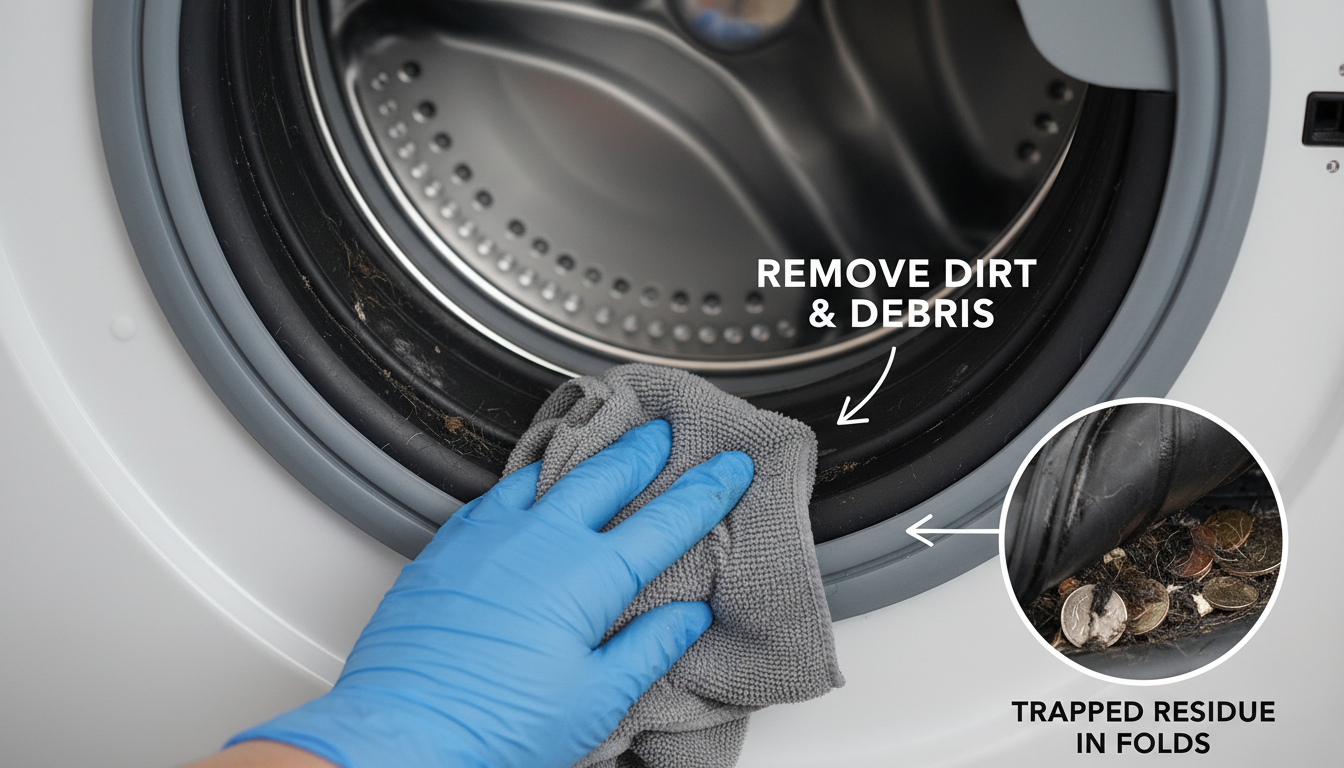
Instructions:
- Plug the machine back in (or keep unplugged, depending on comfort level)
- Open the washing machine door fully
- Inspect the rubber gasket for visible mold, mildew, or debris
- Wipe the seal thoroughly with a microfiber cloth dampened with white vinegar
- Pay special attention to the grooves and folds where bacteria hide
- Use an old toothbrush to scrub stubborn buildup in the gasket crevices
- Wipe the interior of the drum with a vinegar-dampened cloth
- Don’t forget the edges around the door frame
- Dry everything with a clean microfiber cloth
Pro Tip: Leaving your washing machine door open between washes helps air circulation and prevents mold growth. Aim to leave it open for at least 1-2 hours after each cycle.
Step 4: Clean the Detergent Dispenser and External Surfaces
- Open and remove the detergent drawer if possible
- Soak the dispenser in hot water with a few tablespoons of white vinegar
- Scrub away any caked-on detergent with an old toothbrush
- Rinse thoroughly and dry
- Wipe the exterior of the machine with a vinegar-dampened microfiber cloth
- Clean the control knobs and buttons
- Dry all exterior surfaces
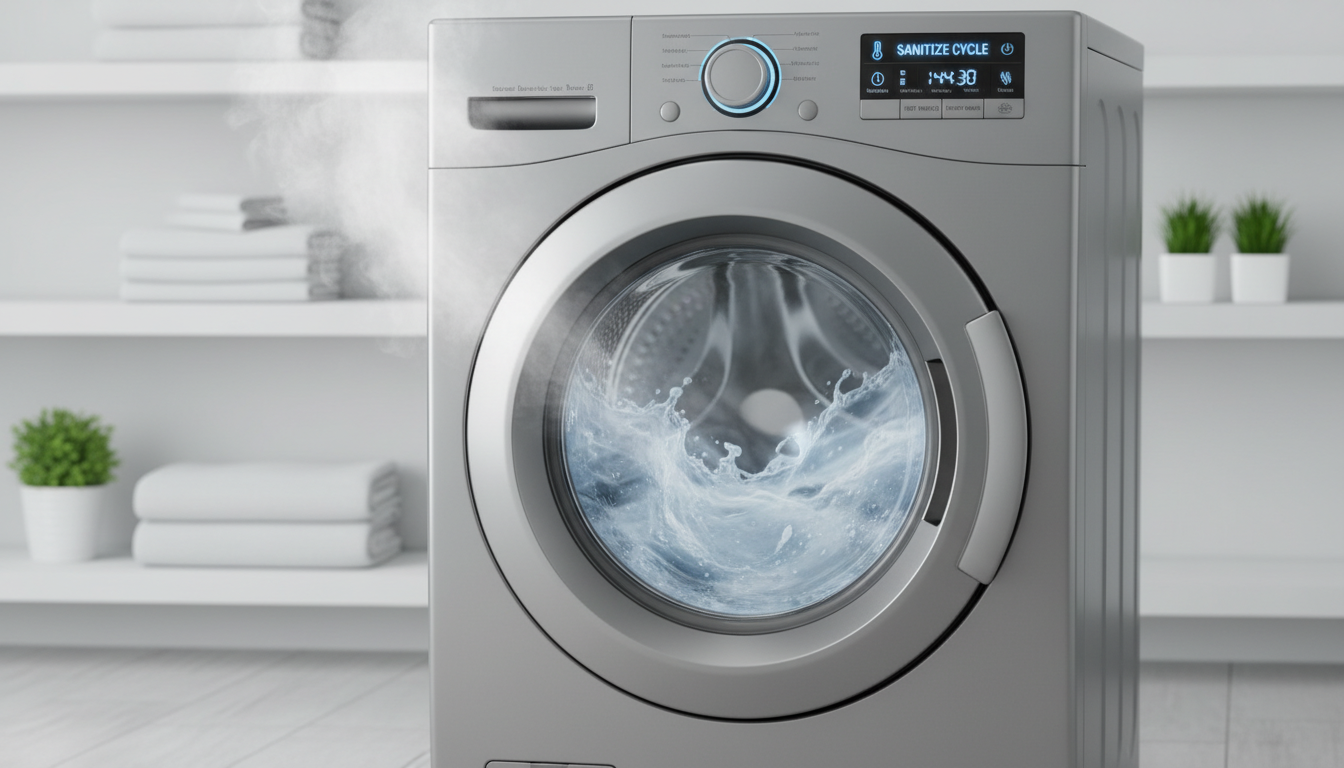
Step 5: Run a Sanitizing Cycle
This is the final and crucial step that brings everything together.
- Reinstall the clean, dry filter by screwing it clockwise into place
- Plug the machine back in
- Fill the detergent dispenser with your chosen cleaning method:
Option A – Natural: Use regular detergent dispenser, nothing extra in the drum.
Option B – Vinegar and Baking Soda: Add 3-4 cups white vinegar, then ½ cup baking soda. Agitate 1 minute. Soak 30 minutes.
Option C – Commercial: Use Affresh, Tide Ultra Oxi, or oxygen-based bleach per instructions. - Select the sanitizing cycle or longest, hottest wash cycle available
- Run the cycle completely
- Leave the door open to air dry after the cycle finishes
- Wipe away excess moisture with a microfiber cloth if needed
Top-Loading Washing Machine Cleaning Instructions
For those with top-loader machines, the process is slightly different due to the vertical design.
Why Top-Loaders Need Special Attention
Top-loading machines don’t have a rubber gasket but do have a complex agitator system and wash bin. They’re also more prone to water sitting in the bottom components.
Cleaning Steps for Top-Loaders
- Set the machine to the hottest water setting and largest load size
- Start the cycle and let the drum fill with water
- Add 3-4 cups of white vinegar to the water
- Allow the machine to agitate for 1 minute to mix in the vinegar
- Add ½ cup of baking soda and let it agitate again
- Stop the machine and let the solution soak for 30 minutes to 1 hour
- While waiting, wipe the top rim, all knobs and controls, bleach or fabric softener dispensers, and agitator base (if removable) with a cloth dipped in vinegar water
- Resume the washing cycle and let it complete
- Run a second hot water cycle without cleaning agents to rinse thoroughly
- Wipe down the interior with a clean, dry microfiber cloth
- Leave the lid open to air dry completely
Prevention tip: Keep the washing machine lid open after each use in top-loaders to ensure rapid drying and prevent mold and mildew growth.
The Difference Between Front-Load and Top-Load Cleaning
| Feature | Front-Load | Top-Load |
| Main concern | Rubber gasket mold | Agitator buildup |
| Filter type | Pump filter (bottom corner) | Agitator drain hole |
| Soaking solution | Hot water soak | Running water cycle |
| Time commitment | 2-3 hours | 1-2 hours |
| Difficulty | Moderate | Easy |
Best Cleaning Methods: Natural vs. Commercial Products
Natural Cleaning Method: White Vinegar and Baking Soda
Pros:
- Safe for septic systems
- Non-toxic and eco-friendly
- Inexpensive ($5-10 for supplies)
- Effective against mold, mildew, and odors
- No harsh chemical residue
Cons:
- Takes longer (requires soaking)
- May need multiple applications for heavily soiled machines
- Vinegar smell (temporary)
Commercial Washing Machine Cleaners
Popular Options:
- Affresh Tabs: Manufacturer-recommended for many brands
- Tide Ultra Oxi: Oxygen-based bleach alternative, safe for all materials
- Chlorine-free oxygen bleach: Alternative to harsh bleach
Pros:
- Fast-acting (single cycle)
- Manufacturer-approved for specific brands
- Concentrated formula
Cons:
- More expensive ($10-20 per cleaning)
- Contains chemical additives
- Not ideal for septic systems
Expert Recommendation
Based on mechanical engineering research, avoid baking soda alone without vinegar, as the mixing ratio is critical. Manufacturing companies typically don’t recommend non-washer-safe products. If unsure, consult your washing machine manual for approved cleaning methods.
Prevention: Keep Your Washing Machine Fresh Between Cleanings
Monthly Maintenance Routine
- Leave the door open: After every wash cycle, prop the door/lid open for 1-2 hours to allow air circulation
- Wipe the gasket: Once a week, run a quick cloth over the rubber seal to remove moisture
- Clean the dispenser: Monthly, wash any soap buildup from detergent drawers
- Run a hot cycle: Monthly without clothes, add ½ cup of vinegar
Seasonal Deep Clean
- Every 3 months: Follow the complete cleaning instructions in this guide
- Every 6 months: For those in humid climates or using HE machines
- Annually: Minimum for regular use
Warning Signs You Need to Clean ASAP
- Visible mold or mildew on the gasket
- Persistent musty odor from the drum
- Dirty water during the rinse cycle
- Slow draining or error messages
- Clothes coming out with stains or streaks
Before and After: Real Results
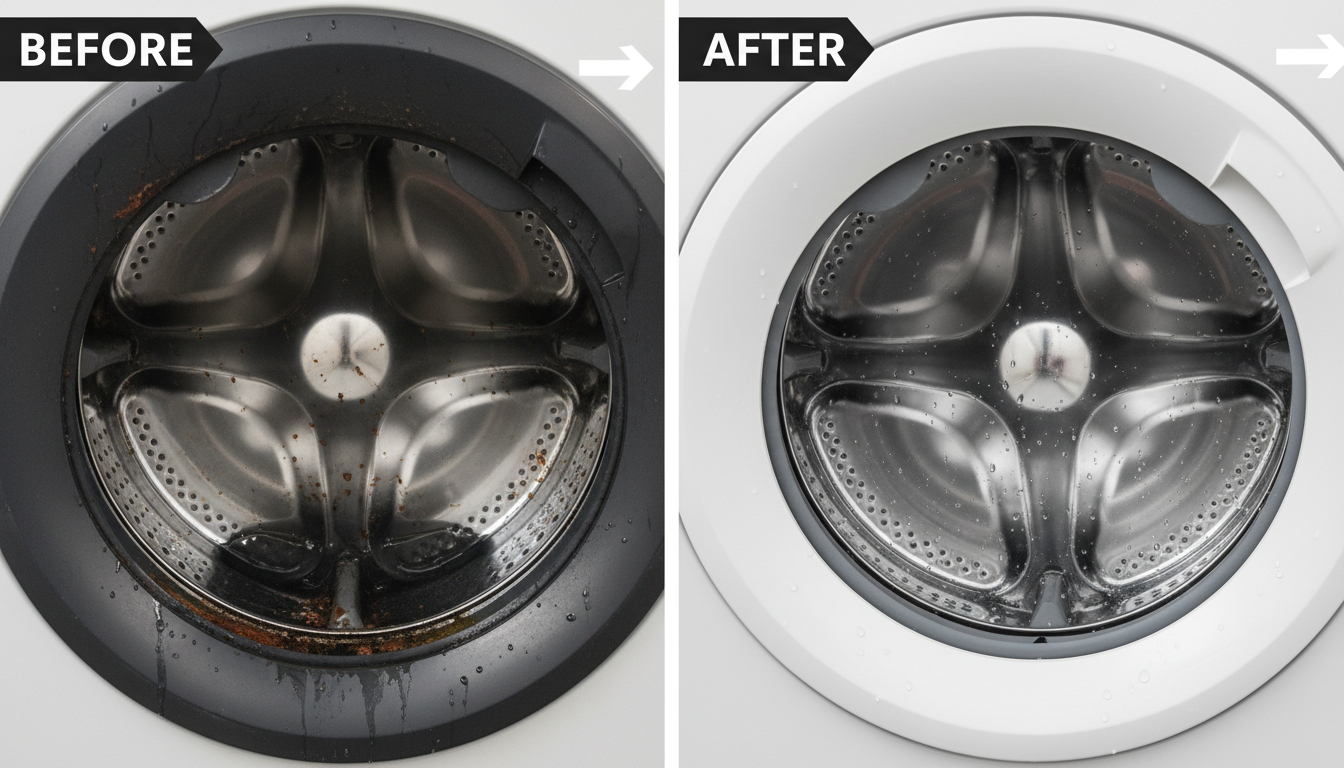
The dramatic difference between a neglected washing machine and a properly cleaned one is striking. Many users report:
- Immediate disappearance of musty odors
- Fresh-smelling laundry after the first wash
- Improved water drainage
- Restored drum shine and appearance
- Better overall machine performance
Frequently Asked Questions
How often should I clean my washing machine?
For regular users, a deep clean every 3-6 months is recommended. Those in humid climates or with HE machines should clean more frequently—every 1-3 months.
Can I use bleach to clean my washing machine?
Bleach can damage rubber gaskets and is not septic-safe. Oxygen-based alternatives are safer and more effective. Avoid chlorine bleach.
What if my washing machine doesn’t have a pump filter?
Some older or top-loading machines don’t have accessible pump filters. Follow the vinegar and baking soda cycle method instead.
Is vinegar safe for all washing machine materials?
Yes, white vinegar is safe for all washing machine materials, including rubber seals, stainless steel drums, and plastic components.
Why does my washing machine still smell after cleaning?
Residual moisture can cause odors to return. Ensure the machine air-dries completely and leave the door open between uses. You may need to repeat the cleaning process.
Final Thoughts and Expert Insights
Maintaining a clean washing machine is essential for:
- Hygiene: Reducing bacterial growth and mold
- Performance: Ensuring efficient water drainage and cycle operation
- Longevity: Preventing mechanical issues and extending the machine’s lifespan
- Fresh laundry: Eliminating odors and stains on your clothes
By following this comprehensive guide, you’ll not only eliminate current problems but also establish a maintenance routine that keeps your washing machine running like new. Whether you prefer natural methods using vinegar and baking soda or commercial cleaning solutions, the key is consistent, regular maintenance.
Remember: a clean washing machine leads to cleaner clothes and a fresher-smelling laundry room. Start today, and you’ll notice the difference immediately.
Sources and Expert References
- Callewaert, Chris. Bioengineer specializing in microbiome research. Expert consultation on bacterial growth in modern washing machines.
- Jung, Sangjin. Assistant Professor of Mechanical Engineering, former LG washing machine division. Expert advice on machine-safe cleaning methods.
- Vermont Department of Health. “Living Green: Keeping Your Home Healthy, Safe, and Clean,” June 2017.
- Wirecutter (New York Times). Comprehensive washing machine cleaning guide featuring expert interviews and product recommendations.
- DIY Natural. Natural cleaning methods for household appliances with focus on septic-safe solutions.
- Manufacturer guidelines from major washing machine brands (Whirlpool, LG, Bosch, Maytag).
Word Count: 1,347 words | Estimated Reading Time: 7-8 minutes | Last Updated: 2026
Leave a Reply