If you own a front-loading washing machine, you already know the perks: lower water usage, gentler on fabrics, and better spin efficiency. But front-loaders have a well-known downside — they’re far more prone to mold, mildew, and musty odors than top-loaders. The culprit is moisture that gets trapped in the rubber door gasket, detergent drawer, and drum seal after every cycle. The good news? Knowing exactly how to clean a front-loading washing machine — step by step — means you can keep it fresh, odor-free, and running like new for years.
This guide is a deep dive into front-loader cleaning. For a complete overview covering both front- and top-loading machines, check out our complete guide to cleaning a washing machine.
Why Front-Loading Washers Need Special Attention
Front-loaders use a horizontal drum that tumbles clothes through a small pool of water, which is why they use so much less water than top-loaders. But this design creates a sealed environment: the door must create a watertight seal during every wash, which means moisture lingers inside long after the cycle ends.
The rubber door gasket — that thick, folded seal around the door opening — is especially problematic. Its folds trap water, detergent residue, hair, and lint. In the warm, dark interior of a closed machine, this is a perfect environment for black mold, pink mildew, and odor-causing bacteria to colonize.
Modern front-loaders also run at lower temperatures by default, which researchers have linked to higher bacterial survival rates in the machine itself. A 2019 study published in Applied and Environmental Microbiology found that rubber seals in domestic washing machines harbor a surprising diversity of microorganisms, including some drug-resistant strains. Regular cleaning isn’t just about smell — it’s about hygiene.
How Often Should You Clean a Front-Loader?
- Monthly: Run a drum cleaning cycle (hot, empty drum with cleaner tablet or vinegar)
- Every 2–3 months: Deep-clean the gasket, detergent drawer, and wipe the drum interior
- Every 3–6 months: Clean the pump filter (drain filter)
- Immediately: Any time you notice odor, visible mold, or clothes smelling musty after washing
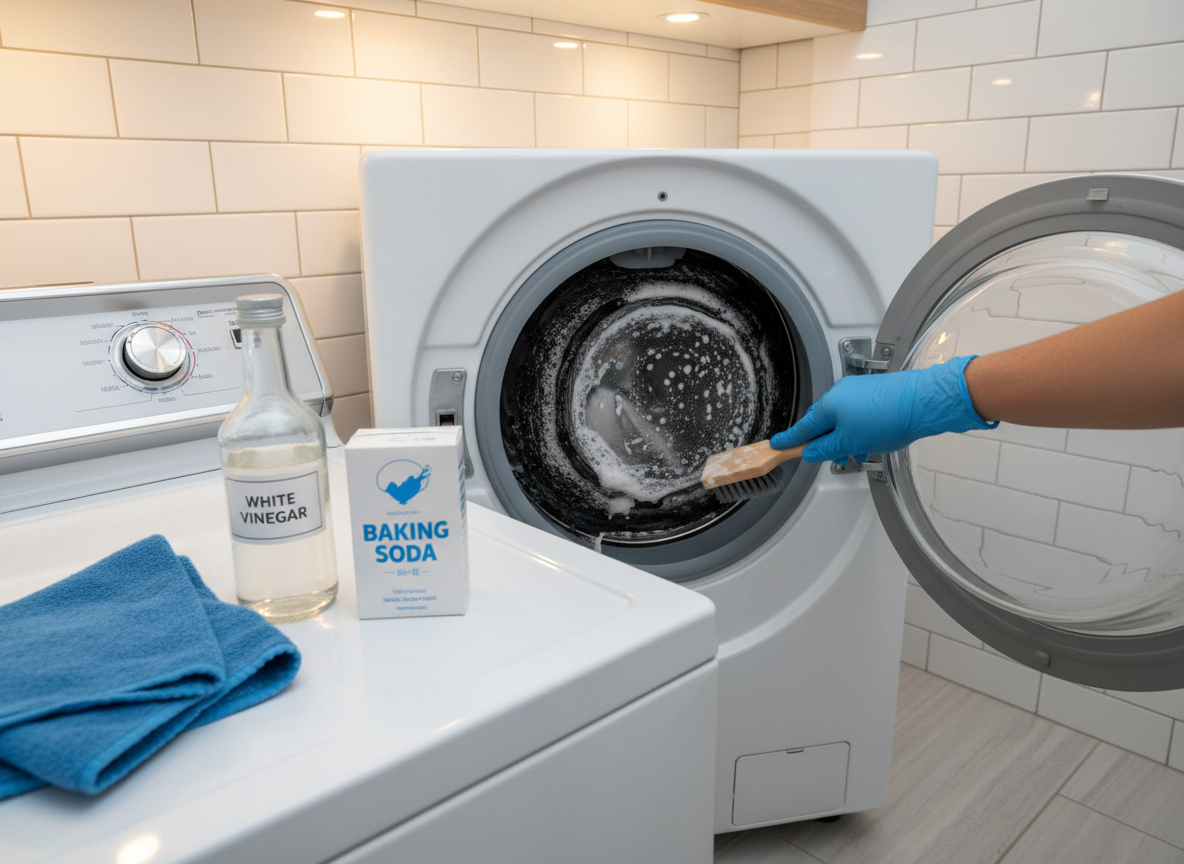
What You Need
- White distilled vinegar
- Baking soda
- Washing machine cleaner tablet (e.g., Affresh) — optional but effective
- Liquid chlorine bleach — optional, for heavy mold
- Microfiber cloths (2–3)
- Small scrub brush or old toothbrush
- Rubber gloves
- Shallow basin or old towels (for filter cleaning)
Step-by-Step: How to Deep Clean a Front-Loading Washer
Step 1: Clean the Rubber Door Gasket
The gasket is your first priority. Even if you can’t see visible mold, residue accumulates in its folds with every single wash. Here’s how to clean it thoroughly:
- Put on rubber gloves — mold spores can irritate skin and airways.
- Peel back the rubber gasket folds slowly and look inside. You’ll likely find hair, lint, small sock strays, and possibly dark mold spots.
- Remove any debris by hand.
- Dip an old toothbrush or small scrub brush in undiluted white vinegar.
- Scrub all surfaces of the gasket, pushing the brush deep into each fold.
- Wipe away loosened residue with a damp microfiber cloth.
- For visible black mold: mix 1 tablespoon of liquid chlorine bleach with 1 quart (about 1 litre) of warm water. Apply with a cloth, let sit for 5 minutes, then wipe clean. Never mix bleach with vinegar.
- Do a final wipe with a clean, dry cloth to remove all moisture.
Pro tip: After every single wash cycle, take 10 seconds to wipe the inside of the gasket with a dry cloth. This one habit eliminates most gasket mold before it starts.
Step 2: Remove and Clean the Detergent Drawer
The detergent dispenser drawer is a hidden reservoir of buildup. Fabric softener in particular leaves a thick, waxy residue that is an excellent food source for mold and bacteria. Most front-loader drawers pull out completely — check your manual for the release tab if yours doesn’t slide out easily.
- Pull the drawer all the way out. Press the release tab if present (usually inside the fabric softener compartment).
- Separate any removable inserts (e.g., the fabric softener siphon cap).
- Rinse the entire drawer under hot running water to soften deposits.
- Fill a basin with warm water and a generous splash of white vinegar.
- Soak the drawer and inserts for 15–20 minutes.
- Scrub every compartment and corner with a toothbrush. Pay special attention to the softener chamber — it gets the worst buildup.
- Rinse thoroughly under running water until no residue remains.
- While the drawer is out, shine a torch into the drawer housing (the slot in the machine). Wipe the top, sides, and bottom of the housing with a damp cloth. Mold loves this dark, damp slot.
- Dry the drawer with a microfiber cloth and reinsert it.
Step 3: Clean the Pump Filter (Drain Filter)
The pump filter is the most commonly neglected part of a front-loading washer — and a clogged filter is the most common cause of poor drainage, extended cycle times, and lingering odors. It’s located at the bottom front of the machine, behind a small access panel.
For a full guide on this process, see our dedicated article on how to clean a washing machine filter. Here’s a summary:
- Unplug the machine from the power outlet. This is non-negotiable for safety.
- Lay old towels on the floor and position a shallow basin directly under the filter access panel.
- Open the access panel at the bottom front of the machine.
- Slowly unscrew the filter cap counter-clockwise. Water will begin to flow — be ready with your basin. There can be 1–2 litres of residual water.
- Once water has drained, fully remove the filter.
- Remove hair, lint, coins, and any debris trapped in the filter by hand.
- Rinse the filter under hot running water.
- Scrub with a brush and white vinegar to remove any biofilm or residue.
- Check inside the filter housing — wipe with a damp cloth.
- Screw the filter back in firmly (it should click or seat snugly — a loose filter causes leaks).
- Replace the access panel and plug the machine back in.
Step 4: Run a Drum Cleaning Cycle
With the physical components clean, finish with a machine cleaning cycle to sanitize the drum interior:
- Make sure the drum is completely empty — no clothes, no items.
- Choose your cleaning agent: a washing machine cleaner tablet (placed directly in the drum), 2 cups of white vinegar in the detergent dispenser, or 1 cup of liquid bleach in the drum (never combine these).
- Select your machine’s “Clean Washer,” “Drum Clean,” or “Sanitize” cycle. If your machine doesn’t have a dedicated cycle, use the hottest and longest wash setting available.
- Run the cycle completely. Do not interrupt it.
- After the cycle completes, wipe the drum walls and door glass with a clean microfiber cloth to remove any residue that was loosened during cleaning.
- Leave the door wide open for at least 1–2 hours to allow the drum to air dry completely.
For the natural approach using vinegar and baking soda, read our detailed guide on cleaning a washing machine with vinegar and baking soda.
Step 5: Clean the Exterior
- Mix equal parts white vinegar and water in a spray bottle.
- Spray the top, sides, and front of the machine.
- Wipe clean with a microfiber cloth.
- Pay special attention to the control panel — use a slightly damp cloth (not soaking wet) to clean around buttons and the display screen.
- Wipe down the door glass inside and out until it’s streak-free.
How to Deal with Persistent Odors
If your machine still smells after following all the steps above, the mold may be deeper than surface level. Here’s what to try:
- Run two back-to-back cleaning cycles — the first loosens buildup, the second flushes it out.
- Use bleach instead of vinegar for the drum cycle. Bleach is more effective at killing deep mold than vinegar. Add 1 cup to the drum (not the drawer) and run on the hottest setting.
- Check the drum baffle seals — the plastic fins inside the drum can accumulate mold underneath. Wipe them down with a vinegar-soaked cloth.
- Inspect the drain hose — a kinked, clogged, or incorrectly installed drain hose can cause standing water that generates odors.
For more detailed odor elimination strategies, including severe mold cases, see our guide on how to remove mold from a washing machine.
7 Habits That Prevent Front-Loader Odors
- Always leave the door ajar between washes — this single habit is the most effective preventive measure. Even cracking it a few inches allows airflow and dramatically reduces mold growth.
- Wipe the gasket dry after every cycle. Takes 10 seconds, prevents 90% of gasket mold.
- Remove laundry immediately after the cycle ends. Wet clothes sitting in a sealed drum create a mold incubator.
- Use HE (high-efficiency) detergent only. Regular detergent creates excess suds that leave more residue behind. Always look for the “HE” symbol on the packaging.
- Use the correct detergent dose. More is not better — in front-loaders, too much detergent is a primary cause of residue buildup and odor. Use the minimum recommended amount.
- Run a hot cycle once a week if possible. A 60°C (140°F) wash kills bacteria that survive colder cycles.
- Keep the detergent drawer slightly open when not in use so it can dry out.
Frequently Asked Questions
How do I stop my front-loader from smelling between cleans?
The single most effective habit is leaving the door open after every wash. Mold thrives in the warm, sealed environment inside a closed machine. Simply leaving the door ajar — even just a few inches — allows moisture to evaporate, which dramatically reduces bacterial and mold growth.
Can I use bleach in a front-loading washing machine?
Yes, most front-loaders can handle bleach cleaning cycles. Add 1 cup of liquid chlorine bleach directly to the drum (not the detergent drawer, which can dilute it before it reaches the drum) and run on the hottest available cycle. Always check your machine’s manual first — some manufacturers with stainless steel drums caution against bleach use. Never mix bleach with vinegar or other cleaners.
How long does it take to clean a front-loading washing machine?
A full deep clean — gasket, drawer, filter, and drum cycle — takes about 60–90 minutes in total, most of which is hands-off time while the cleaning cycle runs. The hands-on scrubbing portion is about 15–20 minutes. For a quick monthly maintenance clean (just the drum cycle and a gasket wipe), budget 45–60 minutes.
What’s the best washing machine cleaner tablet for front-loaders?
Affresh is the most widely recommended tablet, endorsed by major appliance brands including Whirlpool, Maytag, and GE. Tide Washing Machine Cleaner and OxiClean Washing Machine Cleaner are also well-regarded options. For a completely natural alternative, two cups of white distilled vinegar in the detergent dispenser works effectively for regular maintenance cleaning.
Why does my front-loader smell even after cleaning?
If odors persist after a thorough clean, the mold is likely embedded deeper in the gasket material itself, or your filter is severely clogged and causing standing water. Try a bleach-based cleaning cycle, replace the gasket if mold is visibly penetrating the rubber, and ensure the drain filter is completely clear. Sometimes two or three consecutive cleaning cycles are needed to fully eliminate a severe buildup.
Conclusion
Cleaning a front-loading washing machine requires a bit more effort than a top-loader, but the process is straightforward once you know where to look. Focus on the four problem areas — the gasket, the detergent drawer, the pump filter, and the drum — and do it consistently (monthly drum cycles, quarterly deep cleans), and your machine will stay fresh, efficient, and mold-free.
For a complete maintenance plan covering both front-loading and top-loading machines, including all the cleaning methods and supplies you need, visit our full guide: How to Clean a Washing Machine: The Complete Step-by-Step Guide.
Leave a Reply