Когда мы думаем об астронавтах, перед глазами встают образы мужественных людей в скафандрах. Но мало кто знает, что одними из самых важных космических путешественников оказались… обычные червячки. Да-да, крошечные нематоды — круглые черви длиной около одного миллиметра — уже побывали на орбите и помогли учёным совершить настоящие открытия.
Зачем отправлять червей в космос?
Нематоды вида Caenorhabditis elegans — любимцы биологов всего мира. У них всего 959 клеток, их геном полностью расшифрован, а жизненный цикл составляет всего несколько дней. Это делает их идеальными подопытными для изучения того, как невесомость и космическая радиация влияют на живые организмы.
Впервые нематоды отправились на Международную космическую станцию ещё в начале 2000-х годов. С тех пор они побывали там десятки раз. Учёные наблюдали за тем, как черви растут, размножаются и стареют в условиях микрогравитации.
Удивительные открытия
Результаты исследований оказались поразительными. Оказалось, что в космосе у червей изменяется активность генов, отвечающих за мышечную функцию. Это очень важно, ведь у космонавтов тоже происходит атрофия мышц при длительном пребывании на орбите. Изучая червей, учёные ищут способы сохранить здоровье людей во время долгих межпланетных перелётов.
Кроме того, черви помогли понять, как организмы справляются с радиационным облучением. Некоторые особи демонстрировали удивительную устойчивость, что натолкнуло исследователей на новые идеи в области защиты от радиации.
Червячки и будущее освоения космоса
Сегодня нематоды продолжают лететь к звёздам. Они участвуют в экспериментах по изучению старения, иммунитета и воздействия стресса на организм. Каждый полёт приносит новые данные, которые в будущем помогут людям безопасно добраться до Марса и вернуться обратно.
Так что в следующий раз, увидев дождевого червя в саду, отнеситесь к нему с уважением. Возможно, именно его «космические братья» помогут человечеству покорить звёзды.
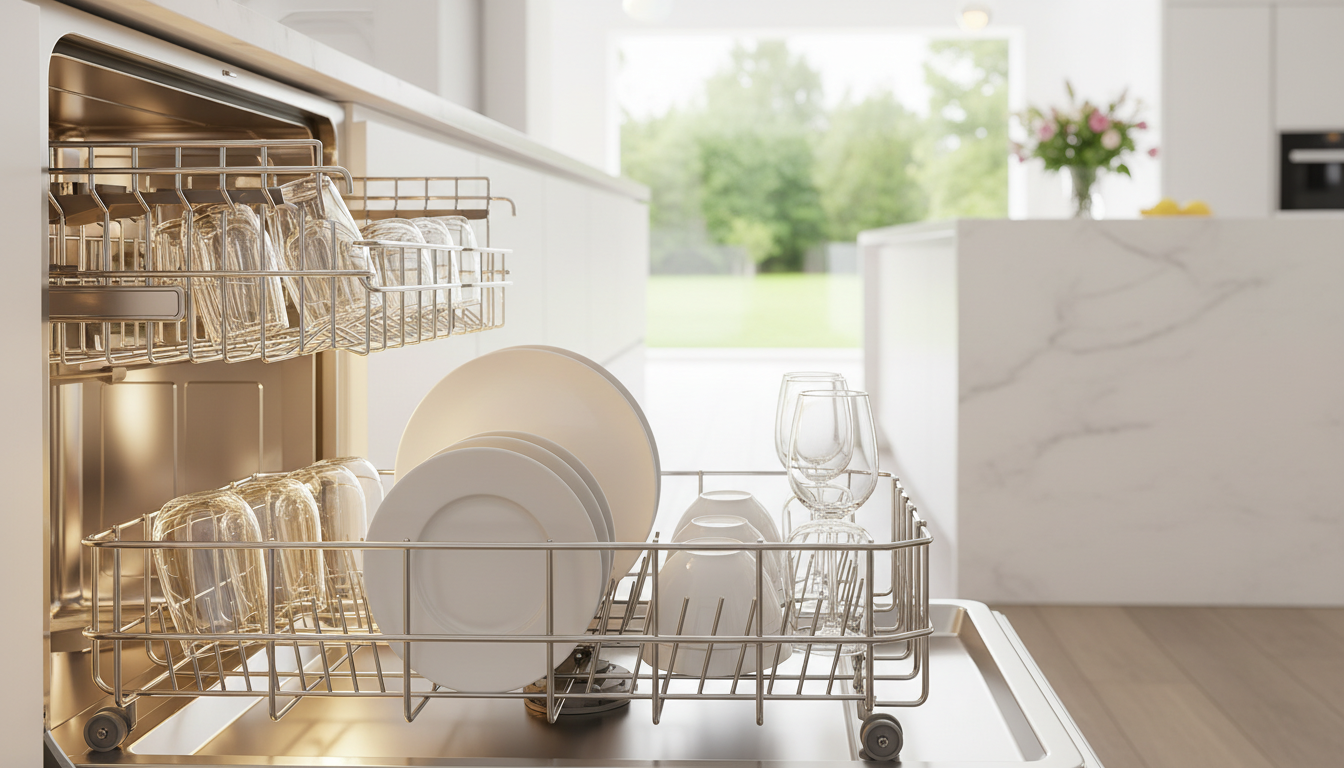
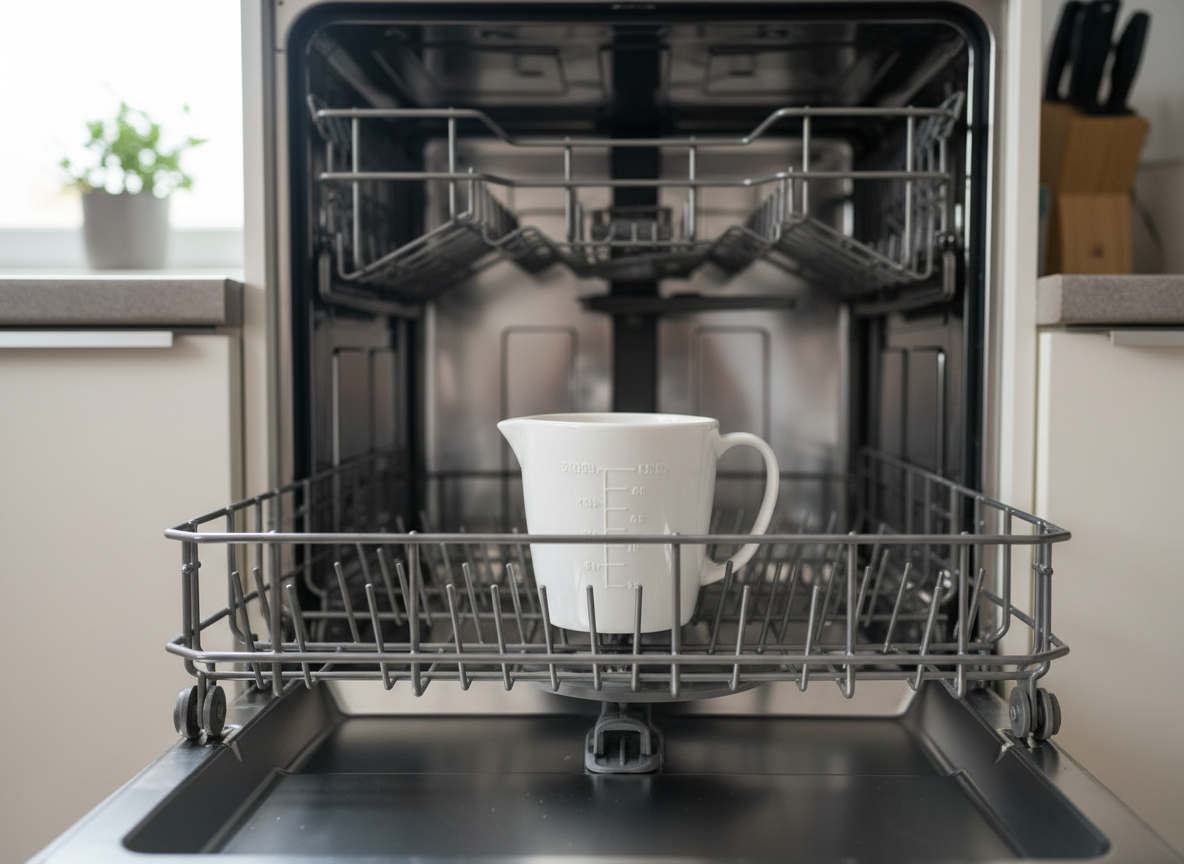
Your dishwasher works hard every day — but when did you last return the favor? Over time, food particles, grease, soap scum, and hard water mineral deposits quietly build up inside your machine, reducing its cleaning power, creating unpleasant odors, and even shortening the appliance’s lifespan. Learning how to clean a dishwasher properly is one of the most impactful things you can do for your kitchen hygiene and your household budget.
In this complete guide, we’ll walk you through every step of a thorough deep clean — from the hidden filter at the bottom to the rubber door seal, the spray arms, and the interior walls. We’ll also cover the best natural cleaning methods using white vinegar and baking soda, when to use commercial dishwasher cleaner tablets, and how to set up a monthly maintenance routine that keeps your machine running like new.
Whether your dishwasher is leaving dishes cloudy, smelling musty, or just not performing the way it used to, this guide has everything you need to restore it to peak condition.
Why You Need to Deep Clean Your Dishwasher Regularly
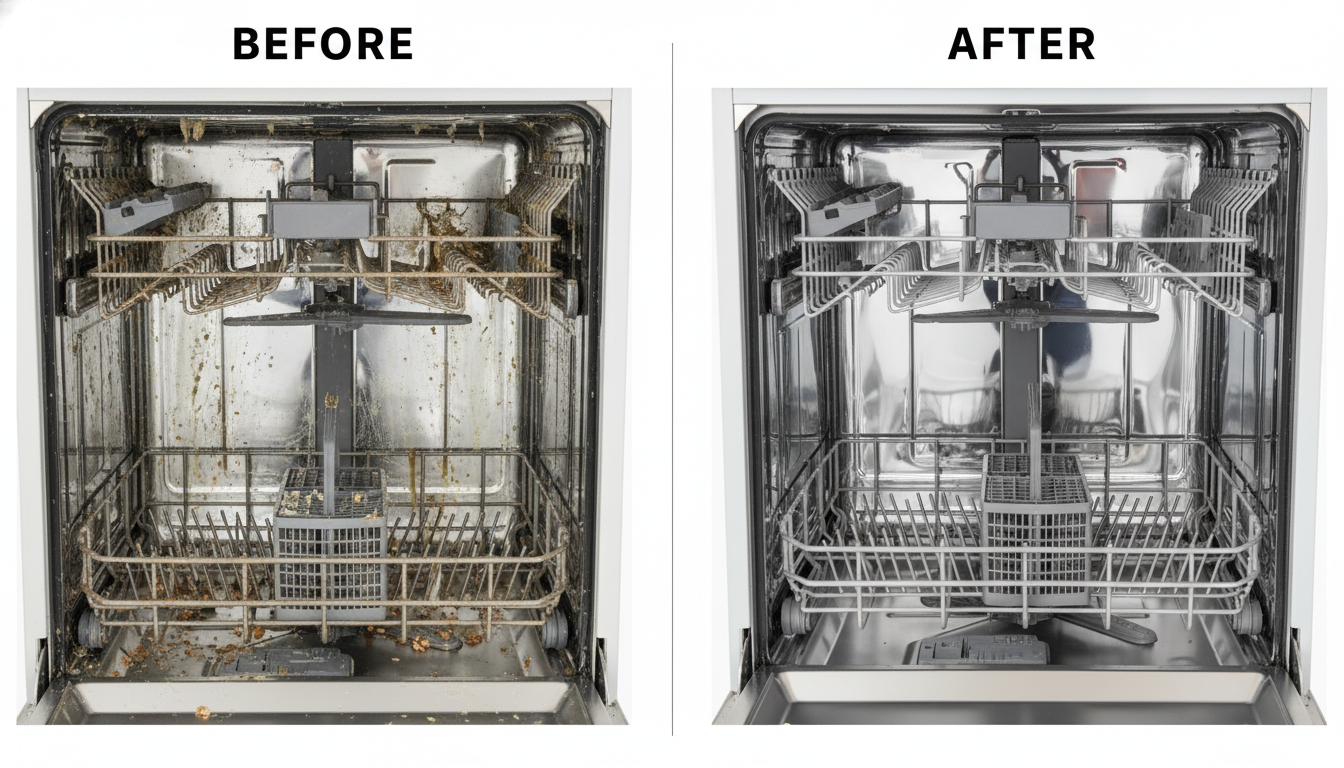
Most people assume that because a dishwasher uses hot water and detergent, it cleans itself automatically. Unfortunately, that’s one of the most common household cleaning myths. The reality is that your dishwasher is constantly exposed to food waste, grease, soap residue, and mineral-laden tap water — and none of that flushes away completely on its own.
Without regular cleaning, these substances accumulate in the filter, clog the spray arm nozzles, coat the interior walls with a filmy residue, and create an ideal environment for mold and mildew to thrive. The result? A machine that uses more energy, cleans less effectively, and develops a persistent musty smell that transfers to your dishes.
Most appliance manufacturers recommend a deep clean at least once a month, with a quick weekly wipe-down in between. If you have hard water, run your dishwasher frequently, or have a large family, consider cleaning it every two to three weeks for best results.
Signs Your Dishwasher Needs Immediate Cleaning
Not sure if it’s time to clean your machine? Here are the telltale signs that your dishwasher is overdue for a thorough cleaning:
Dishes and glasses come out cloudy, greasy, or with visible food residue
A musty, sour, or sewage-like odor coming from inside the machine
White chalky deposits (limescale) visible on the interior walls or racks
Visible buildup around the rubber door gasket or seal
Standing water remaining in the bottom after a cycle
The spray arm is visibly clogged or spins unevenly
Dishes feel gritty or have a white film after washing
The Impact of Hard Water and Limescale on Appliance Lifespan
If your home has hard water — which contains elevated levels of calcium and magnesium minerals — your dishwasher faces an especially tough battle. Hard water leaves behind limescale deposits that build up on the heating element, spray arm nozzles, and filter, progressively reducing efficiency. Over time, these deposits can cause the heating element to burn out prematurely and clog the pump — leading to expensive repairs that a simple monthly cleaning routine could have prevented entirely.
Regular descaling with white vinegar or citric acid is the most effective natural defense against hard water damage in your dishwasher.
Essential Tools and Supplies You’ll Need
Before you start, gather everything you’ll need so you’re not hunting for supplies mid-clean. The good news: most of these items are already in your home.
White distilled vinegar — natural descaler and deodorizer
Baking soda — gentle abrasive and odor absorber
Microfiber cloths or soft rags — for wiping interior surfaces
Old toothbrush or small cleaning brush — for scrubbing tight spaces
Toothpick or thin wire — for unclogging spray arm nozzles
Mild dish soap — for hand-cleaning removable parts
Rubber gloves — to protect hands from grime and cleaning agents
Dishwasher cleaner tablet (optional) — for a heavy-duty deep clean
Small bowl or measuring cup — dishwasher-safe, for the vinegar rinse
You don’t need any specialized commercial products for an effective clean — though dedicated dishwasher cleaner tablets can be a useful addition when you want a hands-off monthly maintenance option.
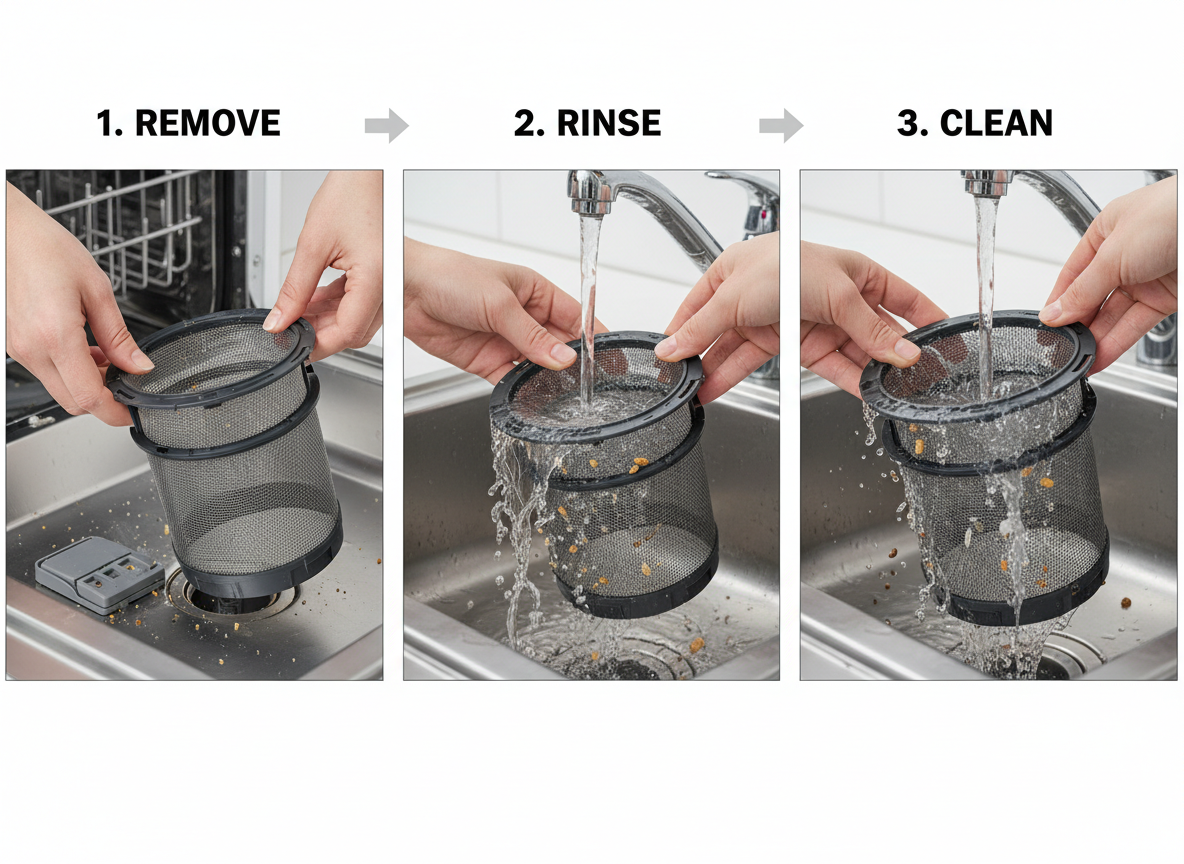
Step 1: How to Clean the Dishwasher Filter and Drain
The filter is the most neglected — and most important — part of your dishwasher. Its job is to trap food particles and debris, preventing them from recirculating onto your dishes or clogging the drain. A clogged filter is the number one cause of poor dishwasher performance, unpleasant odors, and standing water at the bottom of the machine.
Locating and Removing the Manual Filter
Most modern dishwashers have a manual (self-service) filter located at the bottom of the machine, beneath the lower spray arm. Here’s how to remove and clean it:
Remove the lower dish rack to access the bottom of the dishwasher.
Locate the filter — it’s typically a cylindrical or flat component in the center or rear of the dishwasher floor. Some models have two parts: a coarse flat filter and a fine cylindrical filter that twist-locks together.
Turn and lift to remove — most filters twist counterclockwise a quarter turn and then lift out. Check your owner’s manual if unsure.
Rinse under warm running water — hold the filter under the tap and use your fingers or a soft brush to dislodge trapped food particles and grease.
For stubborn buildup, soak the filter for 10-15 minutes in warm water with a few drops of dish soap, then scrub gently with an old toothbrush.
Reinstall securely — turn it clockwise until it locks in place to prevent it from vibrating loose during cycles.
Clearing the Drain to Prevent Standing Water
While the filter is removed, take a moment to inspect the drain area underneath it. Use a damp cloth or paper towel to wipe away any accumulated grit, debris, or standing water from the drain basin. If the drain appears clogged, you can pour a mixture of one cup of white vinegar and half a cup of baking soda directly into the drain, let it fizz for 10-15 minutes, then flush with a kettle of hot (not boiling) water.
Manual vs. Self-Cleaning Filters: What’s the Difference?
Older dishwashers (pre-2010) often have self-cleaning filters that use a built-in macerator (food grinder) to break down debris automatically. These are noisier but require less maintenance. Manual filters, found in most newer models, are quieter and more energy-efficient but require regular hand-cleaning. If you’re unsure which type you have, consult your owner’s manual or search the model number online.
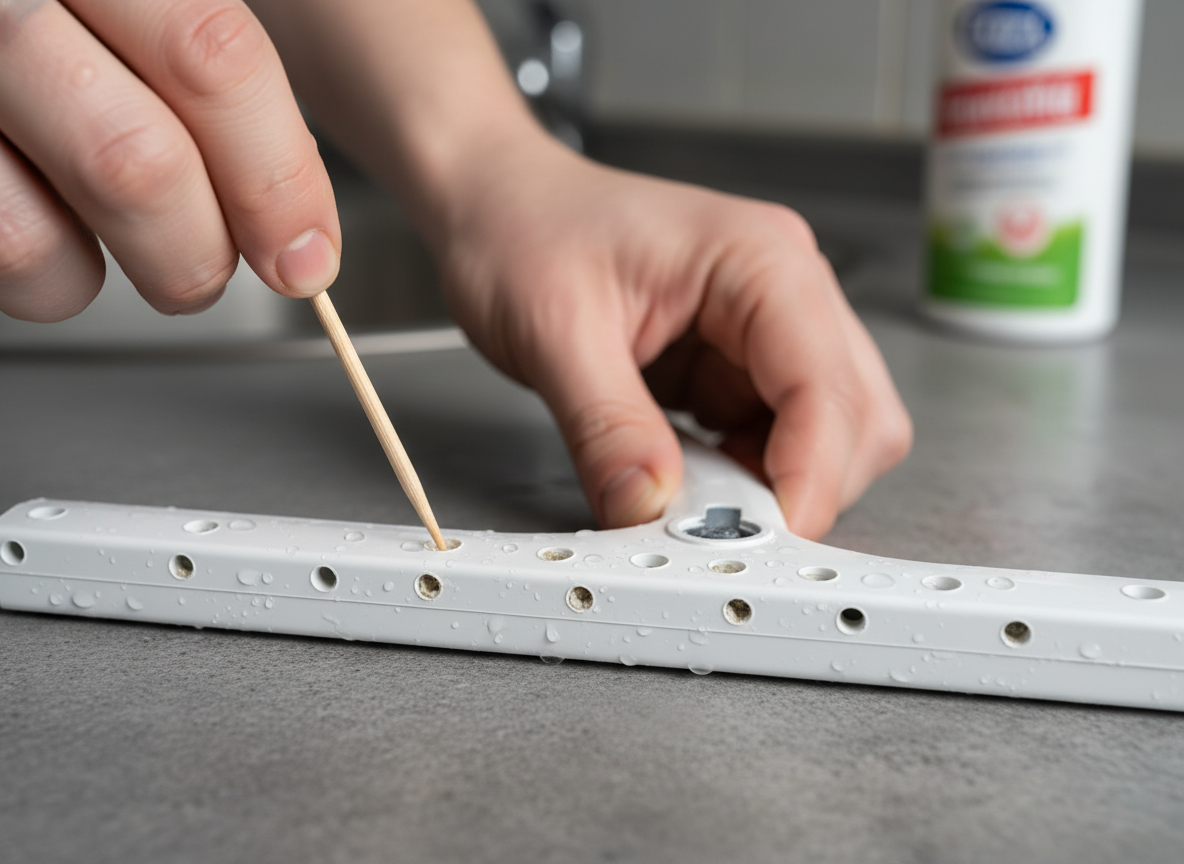
Step 2: Unclogging the Spray Arms for Maximum Water Pressure
The spray arms are responsible for distributing water evenly throughout the dishwasher during a wash cycle. Each arm has dozens of small holes (nozzles) that can become clogged with mineral deposits from hard water or small food particles — reducing water pressure and leaving dishes dirty, especially in the corners and back of the machine.
Removing Mineral Deposits from Spray Arm Nozzles
Follow these steps to clean your dishwasher’s spray arms effectively:
Remove the spray arms — most dishwashers have a lower and upper spray arm. The lower arm typically pulls straight up or unscrews counterclockwise. The upper arm usually unclips or unscrews from the upper rack.
Inspect each nozzle hole — hold the spray arm up to the light to check which holes are blocked.
Use a toothpick, wooden skewer, or thin wire to gently poke through any clogged nozzles, clearing the blockage without enlarging the hole.
Rinse thoroughly under warm running water, shaking the arm to flush out any loosened debris.
For heavy mineral deposits, soak the spray arm in a bowl of white vinegar for 20-30 minutes, then use a toothbrush to scrub away the softened limescale.
Reattach the spray arms firmly and spin them by hand to confirm they rotate freely before running a cycle.
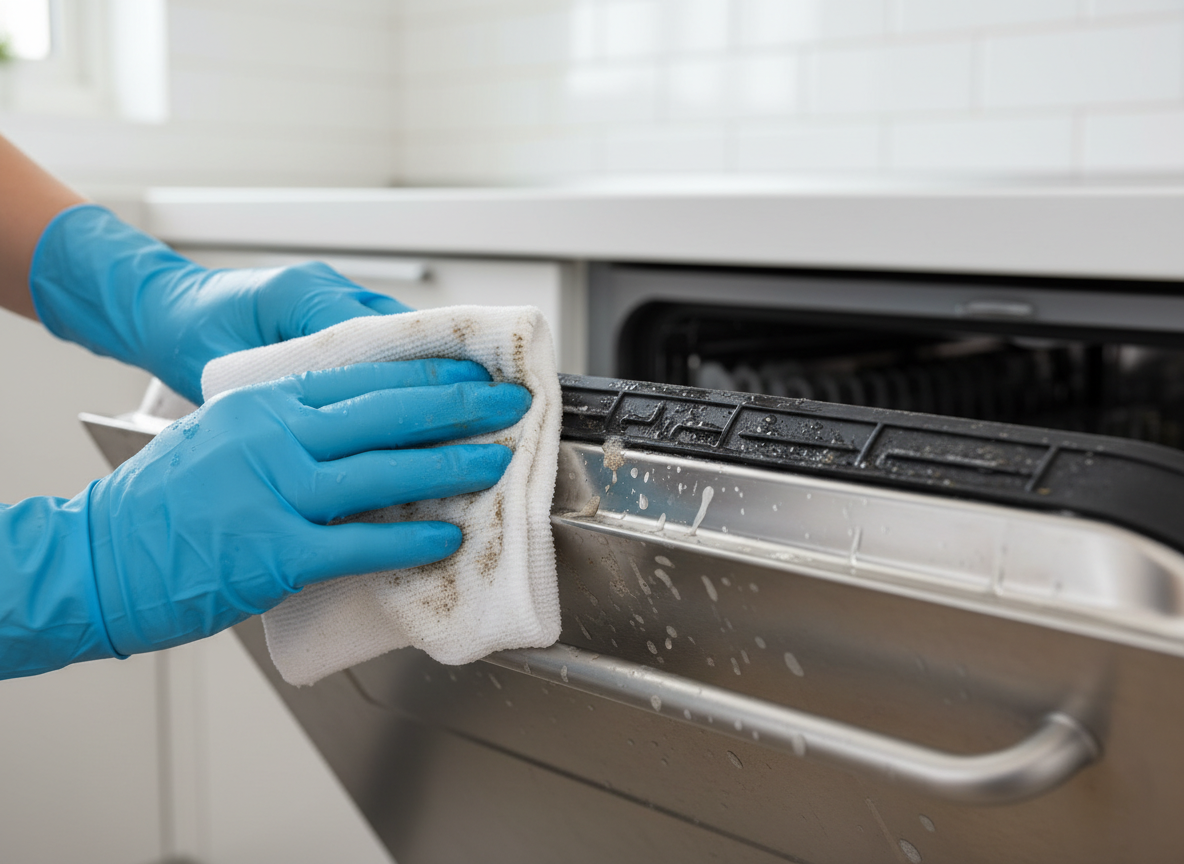
Step 3: Sanitizing the Door Gasket and Interior Walls
The rubber door gasket — the flexible seal that runs around the entire perimeter of the dishwasher door — is one of the most overlooked areas in dishwasher cleaning. This seal creates a watertight barrier during operation, but its folds and crevices are prime real estate for mold, mildew, soap scum, and food buildup.
How to Clean the Door Gasket/Seal Without Damaging the Rubber
Dip a damp cloth or old toothbrush into a solution of warm water and a few drops of mild dish soap.
Carefully work your way around the entire gasket, getting into the folds and creases where buildup hides.
For stubborn mold or mildew, dampen a cloth with undiluted white vinegar and press it against the affected area for 5-10 minutes before scrubbing. The acetic acid dissolves mold effectively without damaging the rubber.
Wipe the inner door panel — the interior surface of the door, especially around the bottom edge and the soap dispenser, accumulates grime and hard water stains. Wipe thoroughly with a microfiber cloth dampened with vinegar.
Clean the interior walls and ceiling — spray white vinegar onto a microfiber cloth and wipe down all interior surfaces, including the side walls and the interior ceiling of the machine.
Removing Mold and Mildew from Hidden Crevices
If you notice black or dark spots in the folds of the door gasket or around the soap dispenser, these are likely mold or mildew colonies. To eliminate them safely, apply full-strength white vinegar directly to the affected area and let it sit for 15 minutes. Then scrub with an old toothbrush, wipe clean, and run a hot cycle to rinse. For severe mold issues, a solution of one tablespoon of bleach diluted in one quart of warm water can be applied carefully with a cloth — but never use bleach in a dishwasher with a stainless steel interior, as it can cause permanent discoloration.
Step 4: The Natural Deep Clean Method Using Vinegar and Baking Soda
Now that the filter, spray arms, gasket, and interior surfaces are manually cleaned, it’s time for the two-cycle natural deep clean that eliminates residual grease, limescale, and odors from every part of the machine.
The Vinegar Rinse: Dissolving Grease and Limescale
White vinegar is a powerhouse natural cleaner for dishwashers. Its acetic acid content dissolves limescale, cuts through grease, neutralizes odors, and has mild antibacterial properties.
Make sure the dishwasher is completely empty.
Fill a dishwasher-safe bowl or measuring cup with 1-2 cups of distilled white vinegar and place it upright in the center of the top rack. Do not pour vinegar into the detergent dispenser — it will drain out before the cleaning cycle begins.
Run a full hot-water cycle (the hottest setting available on your machine). The vinegar will be dispersed throughout the entire interior as the cycle progresses, breaking down grease, dissolving mineral deposits, and deodorizing the machine.
Leave the door ajar at the end of the cycle to allow the interior to air dry and ventilate.
The Baking Soda Cycle: How to Deodorize Your Dishwasher
After the vinegar cycle is complete, the baking soda treatment is an optional but highly effective second step for eliminating any remaining odors and giving the interior a fresh, bright finish.
Sprinkle 1 cup of baking soda evenly across the bottom of the empty dishwasher.
Run a short, hot cycle — the baking soda will dissolve into the water and work as a gentle abrasive and deodorizer, neutralizing any remaining acidic odors and brightening the interior.
Important: Never combine vinegar and baking soda in the same cycle. While mixing them produces a dramatic fizzing reaction, this actually causes the two substances to neutralize each other, eliminating the cleaning benefits of both. Always run them as separate cycles.
Step 5: Using Commercial Dishwasher Cleaner Tablets
If your dishwasher hasn’t been cleaned in a long time, or if you’re dealing with extreme limescale buildup, hard water staining, or a persistent odor that natural methods haven’t fully resolved, a commercial dishwasher cleaner tablet can deliver a more intensive clean.
When to Use a Heavy-Duty Dishwasher Cleaner Tablet
Dishwasher cleaner tablets (from brands like Affresh, Finish, or Cascade) are specifically formulated to break down stubborn deposits that accumulate inside the machine over months of use. They’re particularly effective for:
First-time deep cleans on neglected machines
Homes with very hard water where limescale accumulates rapidly
Monthly maintenance when you don’t want to do a full manual cleaning
Removing heavy grease buildup from the drain and heating element
To use: Place the cleaner tablet in the detergent dispenser or directly in the bottom of an empty dishwasher, then run the hottest cycle available. Do not add any dish detergent. Follow the manufacturer’s instructions on the packaging.
Pro tip: For best results, perform the manual cleaning steps (filter, spray arms, gasket) before running the cleaning tablet. The tablet will then tackle the deeper, harder-to-reach areas of the machine.
How to Clean the Outside of Your Dishwasher
While the interior gets most of the attention, the exterior of your dishwasher also needs periodic cleaning to prevent fingerprints, grease smears, and food splatter from building up on the control panel and door front.
Plastic exterior: Wipe with a soft cloth dampened with warm, soapy water. Rinse and dry immediately to prevent streaks.
Stainless steel exterior: Always wipe in the direction of the grain using a microfiber cloth. Use a stainless steel cleaner or a cloth dampened with diluted white vinegar for fingerprints and smudges. Never use abrasive scrubbers that can scratch the finish.
Control panel: Wipe with a barely damp cloth only — avoid saturating the panel with liquid, which can damage the electronics underneath.
Door handle: Use a microfiber cloth with mild all-purpose cleaner. The handle accumulates significant grease and bacteria from daily use.
Proactive Maintenance: Your Monthly Dishwasher Cleaning Checklist
Establishing a regular cleaning routine is the most effective strategy for maintaining a high-performing, odor-free dishwasher year-round. Here’s a simple maintenance schedule that takes the guesswork out of dishwasher care:
Daily Habits to Prevent Gunk Build-Up
Small daily actions can significantly reduce how much deep cleaning work is required each month:
Scrape (don’t pre-rinse) dishes before loading — remove large food pieces but don’t waste water pre-rinsing. Modern dishwashers and detergents perform better when dishes aren’t too clean going in.
Leave the door ajar after each cycle — this allows moisture to escape and prevents mold and mildew growth in the warm, damp interior.
Don’t overload the machine — overloading blocks the spray arm from rotating and prevents water from reaching all dishes.
Use rinse aid — this prevents water spots and limescale deposits on both your dishes and the interior of the machine.
Weekly: Quick wipe of the door gasket, check and empty the filter if visibly dirty.
Monthly: Full deep clean — filter removal and scrubbing, spray arm unclogging, door gasket scrub, interior wipe-down, and vinegar cycle.
Every 3-6 months: Commercial dishwasher cleaner tablet for a heavy-duty machine refresh, especially if you have hard water.
Troubleshooting Common Dishwasher Odors
If your dishwasher still smells after cleaning, the source is often one of the following:
Sewer or egg smell: Indicates a drain hose issue or dried sewer gas — check that the drain hose is properly installed in a high loop or air gap to prevent backflow.
Musty or mildew smell: Usually caused by leaving the door closed between cycles, trapping moisture. Always leave the door slightly ajar after use.
Chemical or burning smell: Check that plastic items haven’t fallen to the bottom and are melting on the heating element. Also check that no non-dishwasher-safe items were loaded.
Rotten food smell: The filter needs cleaning — usually the primary culprit for stubborn food-based odors.
Frequently Asked Questions About Cleaning a Dishwasher
How often should you clean your dishwasher?
Most manufacturers recommend a full deep clean once a month. If you use your dishwasher daily, have hard water, or notice any performance issues or odors, clean it every two to three weeks. The filter should be inspected weekly and cleaned as needed.
Can I use bleach to clean my dishwasher?
Bleach can be used to kill mold and mildew in plastic-interior dishwashers (½ cup in the bottom of an empty machine, run on a normal cycle). However, never use bleach if your dishwasher has a stainless steel interior or tub — bleach will permanently discolor and damage stainless steel surfaces. Check your owner’s manual before using bleach.
Is it safe to clean a dishwasher with vinegar?
Yes — white distilled vinegar is safe and effective for most dishwashers. It dissolves limescale, cuts through grease, and deodorizes naturally without leaving harmful chemical residues. The only caution: some rubber gaskets can degrade with very frequent, undiluted vinegar exposure over years of use. Using the vinegar-in-a-cup method (rather than pouring directly into the machine) limits exposure time and keeps things safe.
Why does my dishwasher smell even after cleaning?
If odors persist after a full deep clean, check the drain hose for clogs or improper installation, inspect the door gasket for hidden mold in deep crevices, ensure the filter is properly reinstalled (a loose filter allows particles to bypass the filtration system), and try a commercial dishwasher cleaner tablet for a more intensive chemical treatment.
Keeping your dishwasher clean isn’t just about hygiene — it’s about protecting a significant household investment. A well-maintained dishwasher runs more efficiently, lasts years longer, and delivers reliably spotless results every single cycle. With the step-by-step cleaning routine in this guide and a consistent monthly maintenance schedule, you’ll never have to deal with cloudy glasses, lingering odors, or a poorly performing machine again.
Have you noticed your freshly washed laundry smells stale or your washing machine drum looks grimy? You’re not alone. Over time, washing machines accumulate dirt, grime, detergent residue, and mold that can affect both the cleanliness of your clothes and the machine’s performance. The good news? Learning how to clean a washing machine is easier than you think, and you can do it with simple household ingredients like white vinegar and baking soda.
This comprehensive guide will teach you everything you need to know about washing machine maintenance, whether you have a front-loading or top-loading machine. We’ve consulted expert advice and analyzed the best practices to help you keep your appliance running efficiently while eliminating unpleasant odors.
Why Should You Clean Your Washing Machine?
Many people ask: “Why clean a machine that uses hot water and soap regularly?” The answer lies in understanding how modern washing machines work.
The Science Behind Machine Buildup
Over the years, washing machines—especially those designed after the 1990s—have shifted toward lower-temperature washing cycles. This transition, combined with enzyme-based detergents replacing phosphate-based formulas, created the perfect environment for bacterial growth. These bacteria thrive in the moist, cool environment of your washing machine’s drum, pump filter, and rubber gasket.
Common Problems Caused by Dirty Washing Machines
Unpleasant odors: Bacteria and mold growth create that distinctive “stale” smell that transfers to your clean laundry
Soap scum and detergent residue: Buildup on the drum and internal components reduces cleaning effectiveness
Mold and mildew growth: Particularly in front-loading machines due to the rubber gasket design
Lime deposits: Hard water minerals can accumulate in pipes and reduce machine efficiency
Mysterious stains: Grime and residue can streak your clothes during the wash cycle
Pump filter clogs: Debris accumulation can block water drainage and cause mechanical problems
Who’s Most at Risk?
Owners of HE (high-efficiency) washers that hold residual water in components
People living in humid climates where washers don’t dry completely between loads
Those with hard water that causes mineral buildup
Families who don’t regularly leave their washing machine door open to air dry
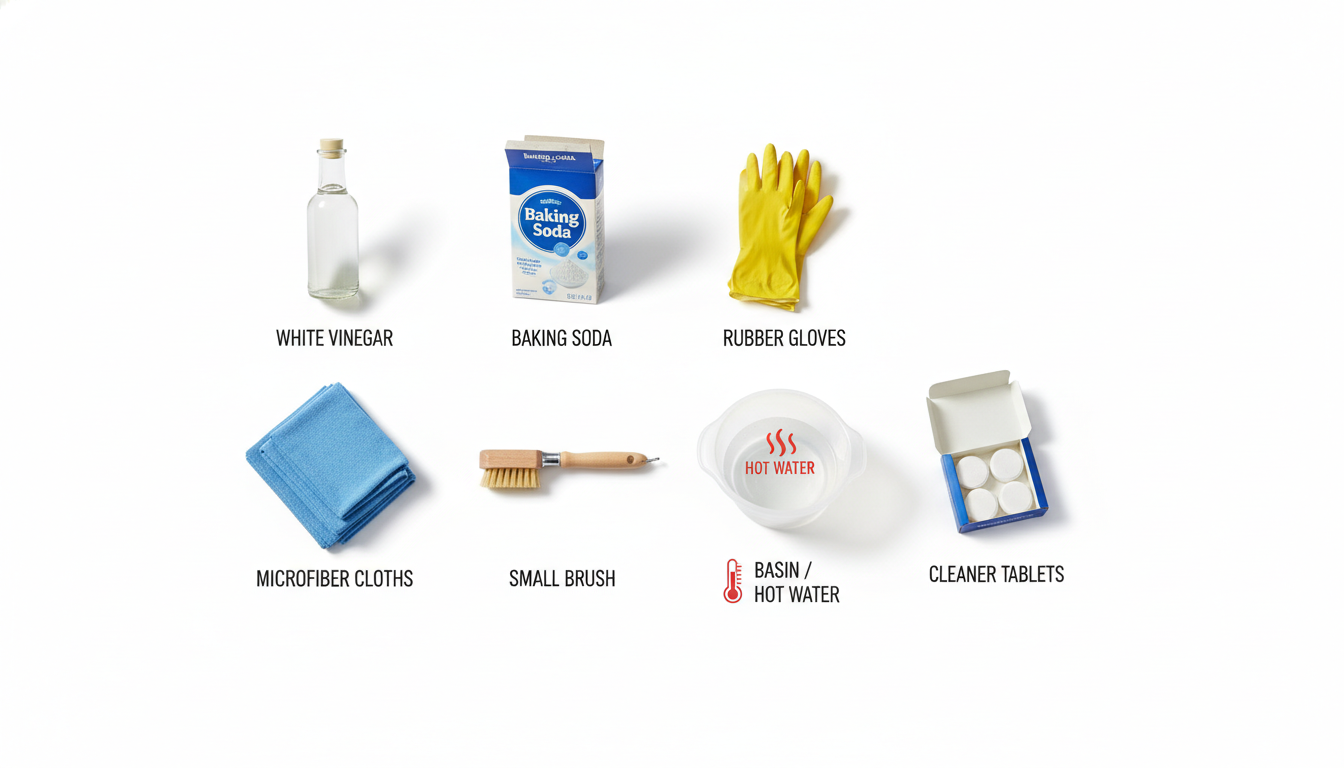
What You’ll Need: Tools and Supplies Guide
Essential Cleaning Supplies
White vinegar (2-4 cups): A natural bacteria fighter and descaling agent
Baking soda (½ cup): Powerful deodorizer and grime remover
Microfiber cloths (2-3 pieces): For gentle, streak-free drying
Rubber gloves: Protects hands from bacteria and cleaning solutions
Small scrub brush: For reaching ridges and crevices in filters
Equipment
Shallow basin or container: To catch water when removing the filter
24-32 ounce soaking container: For filter submersion
Washing machine cleaner tablets (optional): Commercial alternatives like Affresh or Tide Ultra Oxi
Old toothbrush: For detailed cleaning of knobs and dispensers
Optional Professional Products
Affresh washing machine cleaner tablets
Tide Ultra Oxi Powder Laundry Detergent
Oxygen-based bleach alternatives (chlorine-free)
How Long Does It Take to Clean a Washing Machine?
Active cleaning time: 30-45 minutes
Soak time: 15 minutes to 1 hour
Machine cleaning cycle: 45 minutes to 1.5 hours (depending on your model)
Total time: 2-3 hours (mostly passive waiting time)
Step-by-Step Instructions: How to Clean Your Washing Machine
For Front-Loading Washing Machines
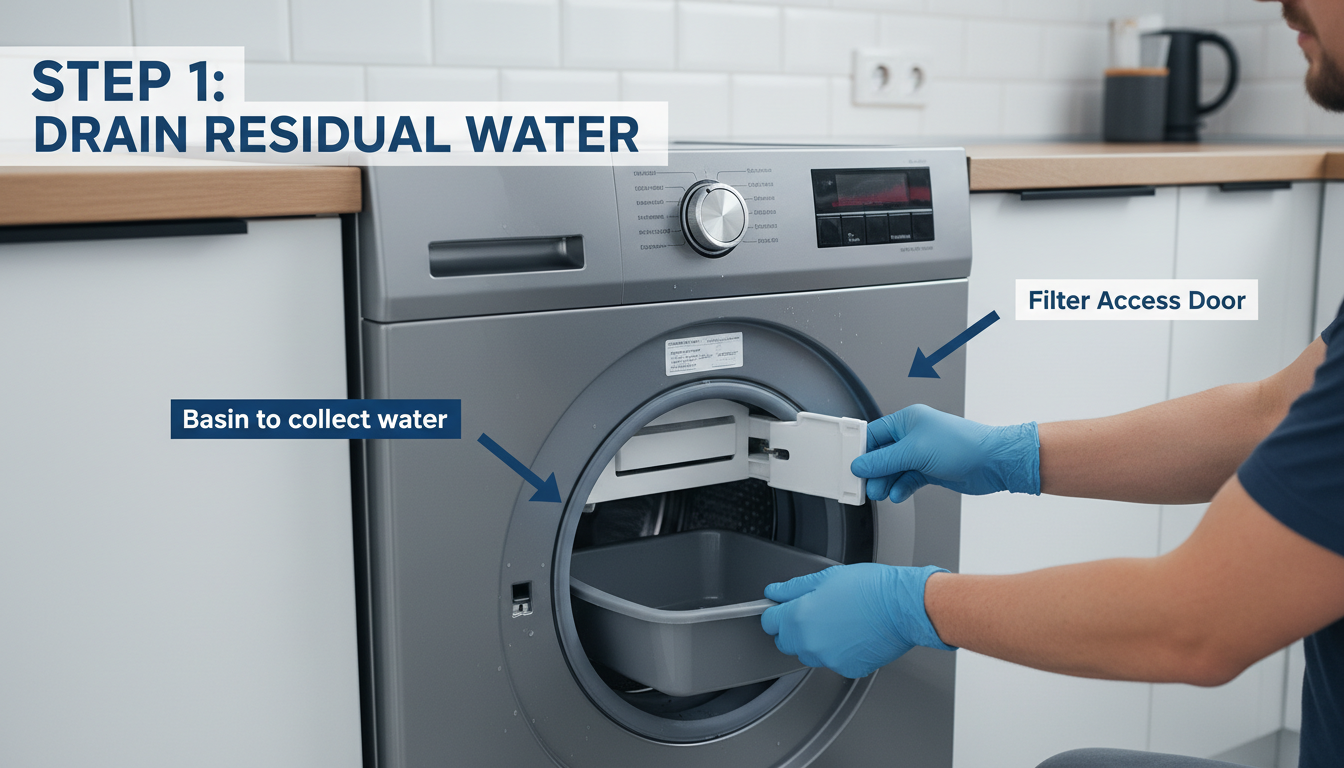
Step 1: Extract and Clean the Filter
Front-loading machines have a pump filter located at the bottom corner. This is the most important component to clean, as debris accumulates here and can cause drainage problems.
Instructions:
Unplug your washing machine for safety
Place a shallow basin on the floor directly under the filter access door
Open the small door/panel where the filter is located
Wipe the interior of the access area with a dry cloth
Slowly unscrew the filter in a counterclockwise direction—water will begin to pour out
Keep your microfiber cloth nearby to catch spills
Empty and rinse the basin if water spills
Remove the filter completely and place it on a microfiber towel
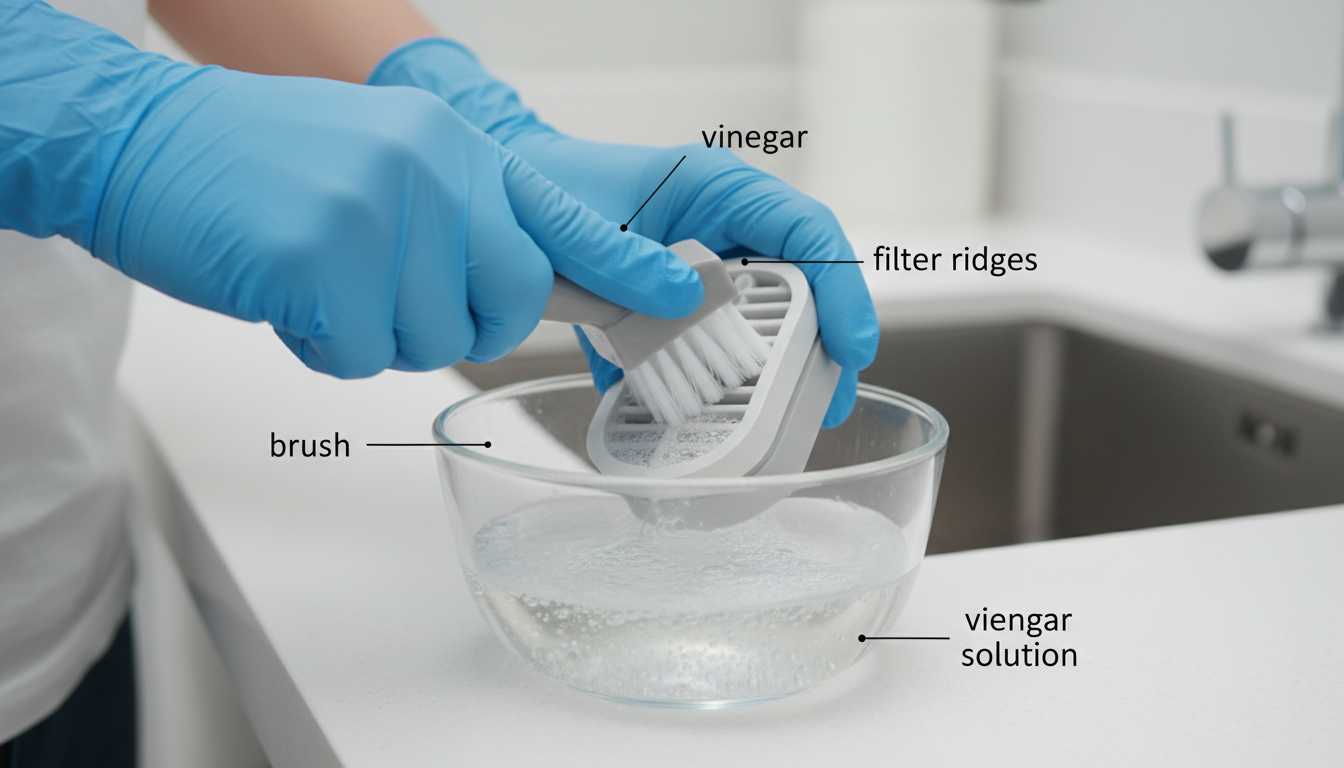
Step 2: Deep Clean the Filter
The filter is where most debris accumulates. Inspect it carefully and clean all ridges.
Instructions:
Examine the filter for hair, lint, and debris
Remove larger particles by hand
Dip a small brush into white vinegar
Scrub all ridges and crevices thoroughly, paying attention to the fine mesh areas
Rinse the filter under hot running water
Place the clean filter in a container filled with hot water
Let it soak for 15 minutes to 1 hour (longer for heavily soiled filters)
After soaking, rinse again under hot water
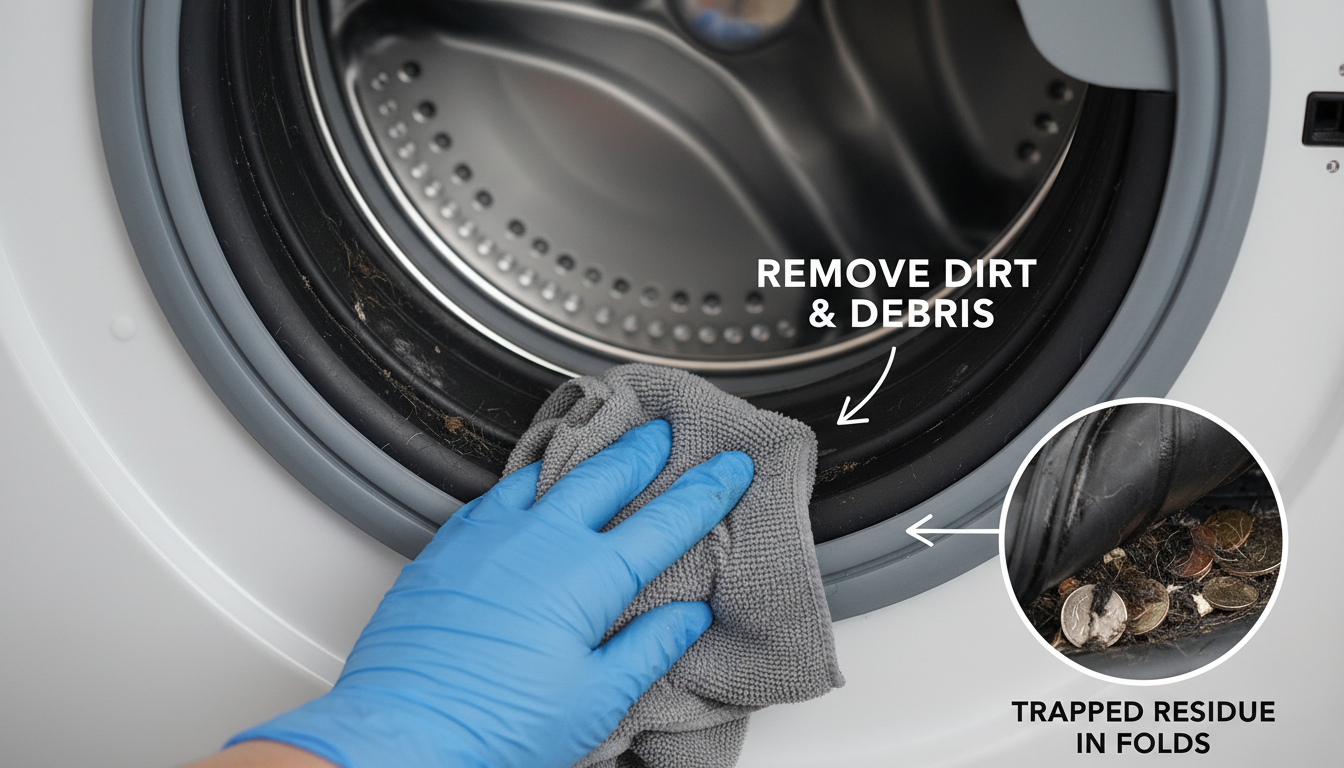
Step 3: Clean the Rubber Gasket and Drum Interior
The rubber gasket (seal around the door) is a common hiding spot for mold, mildew, hair, and small objects.
Instructions:
Plug the machine back in (or keep unplugged, depending on comfort level)
Open the washing machine door fully
Inspect the rubber gasket for visible mold, mildew, or debris
Wipe the seal thoroughly with a microfiber cloth dampened with white vinegar
Pay special attention to the grooves and folds where bacteria hide
Use an old toothbrush to scrub stubborn buildup in the gasket crevices
Wipe the interior of the drum with a vinegar-dampened cloth
Don’t forget the edges around the door frame
Dry everything with a clean microfiber cloth
Pro Tip: Leaving your washing machine door open between washes helps air circulation and prevents mold growth. Aim to leave it open for at least 1-2 hours after each cycle.
Step 4: Clean the Detergent Dispenser and External Surfaces
Open and remove the detergent drawer if possible
Soak the dispenser in hot water with a few tablespoons of white vinegar
Scrub away any caked-on detergent with an old toothbrush
Rinse thoroughly and dry
Wipe the exterior of the machine with a vinegar-dampened microfiber cloth
Clean the control knobs and buttons
Dry all exterior surfaces
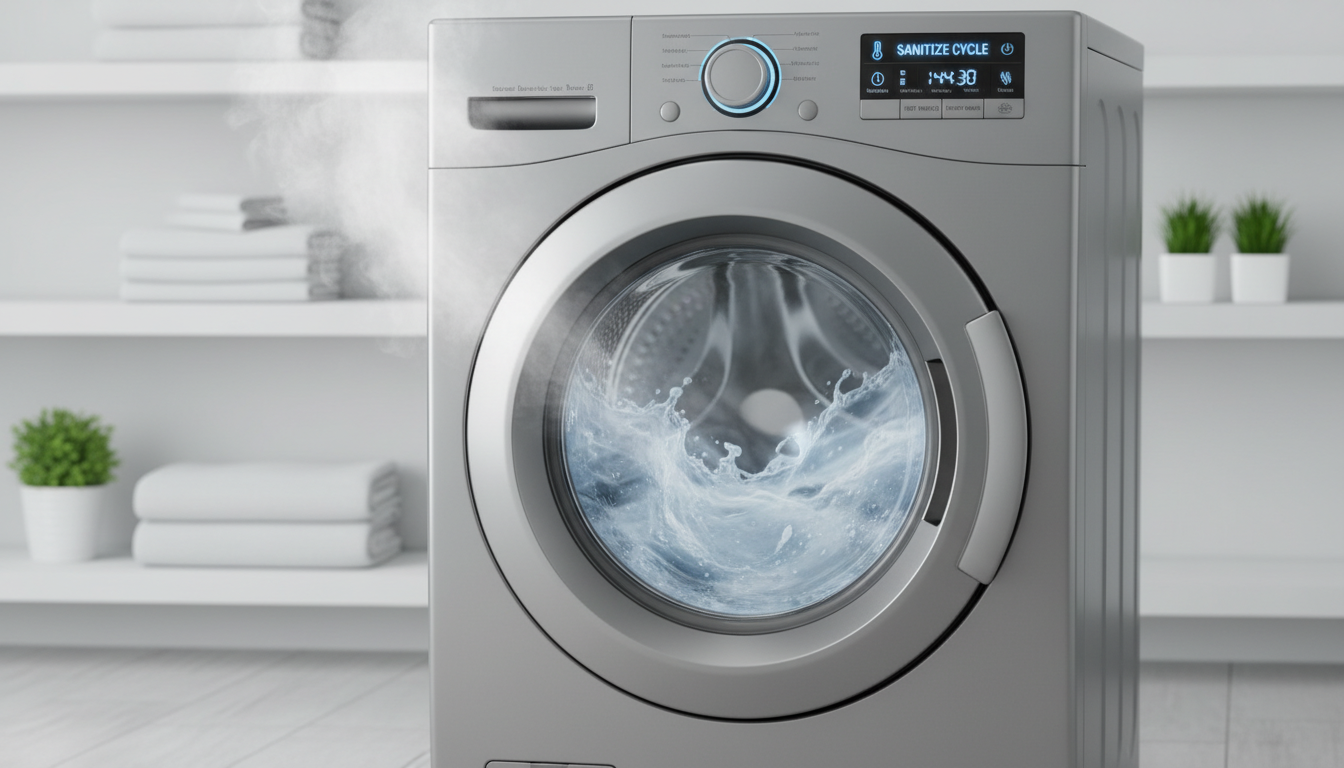
Step 5: Run a Sanitizing Cycle
This is the final and crucial step that brings everything together.
Reinstall the clean, dry filter by screwing it clockwise into place
Plug the machine back in
Fill the detergent dispenser with your chosen cleaning method: Option A – Natural: Use regular detergent dispenser, nothing extra in the drum. Option B – Vinegar and Baking Soda: Add 3-4 cups white vinegar, then ½ cup baking soda. Agitate 1 minute. Soak 30 minutes. Option C – Commercial: Use Affresh, Tide Ultra Oxi, or oxygen-based bleach per instructions.
Select the sanitizing cycle or longest, hottest wash cycle available
Run the cycle completely
Leave the door open to air dry after the cycle finishes
Wipe away excess moisture with a microfiber cloth if needed
Top-Loading Washing Machine Cleaning Instructions
For those with top-loader machines, the process is slightly different due to the vertical design.
Why Top-Loaders Need Special Attention
Top-loading machines don’t have a rubber gasket but do have a complex agitator system and wash bin. They’re also more prone to water sitting in the bottom components.
Cleaning Steps for Top-Loaders
Set the machine to the hottest water setting and largest load size
Start the cycle and let the drum fill with water
Add 3-4 cups of white vinegar to the water
Allow the machine to agitate for 1 minute to mix in the vinegar
Add ½ cup of baking soda and let it agitate again
Stop the machine and let the solution soak for 30 minutes to 1 hour
While waiting, wipe the top rim, all knobs and controls, bleach or fabric softener dispensers, and agitator base (if removable) with a cloth dipped in vinegar water
Resume the washing cycle and let it complete
Run a second hot water cycle without cleaning agents to rinse thoroughly
Wipe down the interior with a clean, dry microfiber cloth
Leave the lid open to air dry completely
Prevention tip: Keep the washing machine lid open after each use in top-loaders to ensure rapid drying and prevent mold and mildew growth.
The Difference Between Front-Load and Top-Load Cleaning
Feature
Front-Load
Top-Load
Main concern
Rubber gasket mold
Agitator buildup
Filter type
Pump filter (bottom corner)
Agitator drain hole
Soaking solution
Hot water soak
Running water cycle
Time commitment
2-3 hours
1-2 hours
Difficulty
Moderate
Easy
Best Cleaning Methods: Natural vs. Commercial Products
Natural Cleaning Method: White Vinegar and Baking Soda
Pros:
Safe for septic systems
Non-toxic and eco-friendly
Inexpensive ($5-10 for supplies)
Effective against mold, mildew, and odors
No harsh chemical residue
Cons:
Takes longer (requires soaking)
May need multiple applications for heavily soiled machines
Vinegar smell (temporary)
Commercial Washing Machine Cleaners
Popular Options:
Affresh Tabs: Manufacturer-recommended for many brands
Tide Ultra Oxi: Oxygen-based bleach alternative, safe for all materials
Chlorine-free oxygen bleach: Alternative to harsh bleach
Pros:
Fast-acting (single cycle)
Manufacturer-approved for specific brands
Concentrated formula
Cons:
More expensive ($10-20 per cleaning)
Contains chemical additives
Not ideal for septic systems
Expert Recommendation
Based on mechanical engineering research, avoid baking soda alone without vinegar, as the mixing ratio is critical. Manufacturing companies typically don’t recommend non-washer-safe products. If unsure, consult your washing machine manual for approved cleaning methods.
Prevention: Keep Your Washing Machine Fresh Between Cleanings
Monthly Maintenance Routine
Leave the door open: After every wash cycle, prop the door/lid open for 1-2 hours to allow air circulation
Wipe the gasket: Once a week, run a quick cloth over the rubber seal to remove moisture
Clean the dispenser: Monthly, wash any soap buildup from detergent drawers
Run a hot cycle: Monthly without clothes, add ½ cup of vinegar
Seasonal Deep Clean
Every 3 months: Follow the complete cleaning instructions in this guide
Every 6 months: For those in humid climates or using HE machines
Annually: Minimum for regular use
Warning Signs You Need to Clean ASAP
Visible mold or mildew on the gasket
Persistent musty odor from the drum
Dirty water during the rinse cycle
Slow draining or error messages
Clothes coming out with stains or streaks
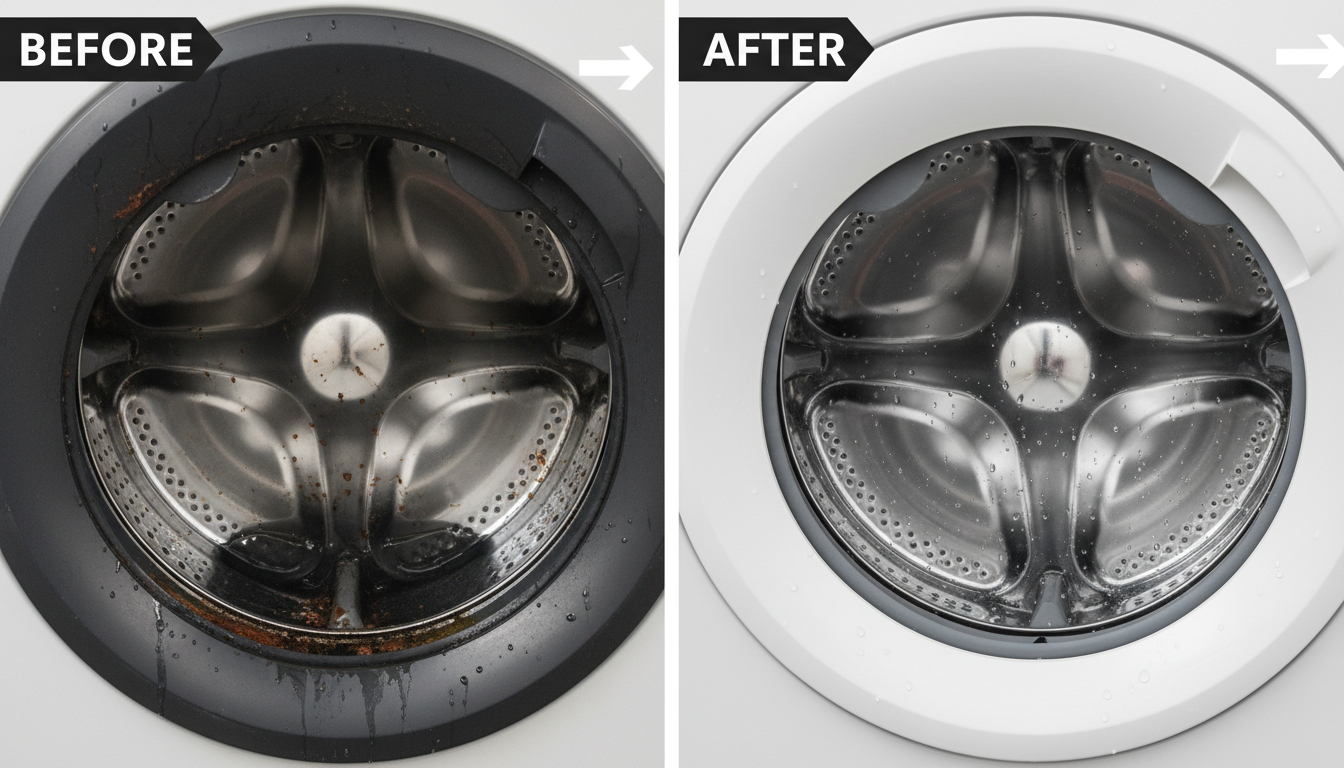
Before and After: Real Results
The dramatic difference between a neglected washing machine and a properly cleaned one is striking. Many users report:
Immediate disappearance of musty odors
Fresh-smelling laundry after the first wash
Improved water drainage
Restored drum shine and appearance
Better overall machine performance
Frequently Asked Questions
How often should I clean my washing machine?
For regular users, a deep clean every 3-6 months is recommended. Those in humid climates or with HE machines should clean more frequently—every 1-3 months.
Can I use bleach to clean my washing machine?
Bleach can damage rubber gaskets and is not septic-safe. Oxygen-based alternatives are safer and more effective. Avoid chlorine bleach.
What if my washing machine doesn’t have a pump filter?
Some older or top-loading machines don’t have accessible pump filters. Follow the vinegar and baking soda cycle method instead.
Is vinegar safe for all washing machine materials?
Yes, white vinegar is safe for all washing machine materials, including rubber seals, stainless steel drums, and plastic components.
Why does my washing machine still smell after cleaning?
Residual moisture can cause odors to return. Ensure the machine air-dries completely and leave the door open between uses. You may need to repeat the cleaning process.
Final Thoughts and Expert Insights
Maintaining a clean washing machine is essential for:
Hygiene: Reducing bacterial growth and mold
Performance: Ensuring efficient water drainage and cycle operation
Longevity: Preventing mechanical issues and extending the machine’s lifespan
Fresh laundry: Eliminating odors and stains on your clothes
By following this comprehensive guide, you’ll not only eliminate current problems but also establish a maintenance routine that keeps your washing machine running like new. Whether you prefer natural methods using vinegar and baking soda or commercial cleaning solutions, the key is consistent, regular maintenance.
Remember: a clean washing machine leads to cleaner clothes and a fresher-smelling laundry room. Start today, and you’ll notice the difference immediately.
Sources and Expert References
Callewaert, Chris. Bioengineer specializing in microbiome research. Expert consultation on bacterial growth in modern washing machines.
Jung, Sangjin. Assistant Professor of Mechanical Engineering, former LG washing machine division. Expert advice on machine-safe cleaning methods.
Vermont Department of Health. “Living Green: Keeping Your Home Healthy, Safe, and Clean,” June 2017.
Wirecutter (New York Times). Comprehensive washing machine cleaning guide featuring expert interviews and product recommendations.
DIY Natural. Natural cleaning methods for household appliances with focus on septic-safe solutions.
Manufacturer guidelines from major washing machine brands (Whirlpool, LG, Bosch, Maytag).
Word Count: 1,347 words | Estimated Reading Time: 7-8 minutes | Last Updated: 2026